
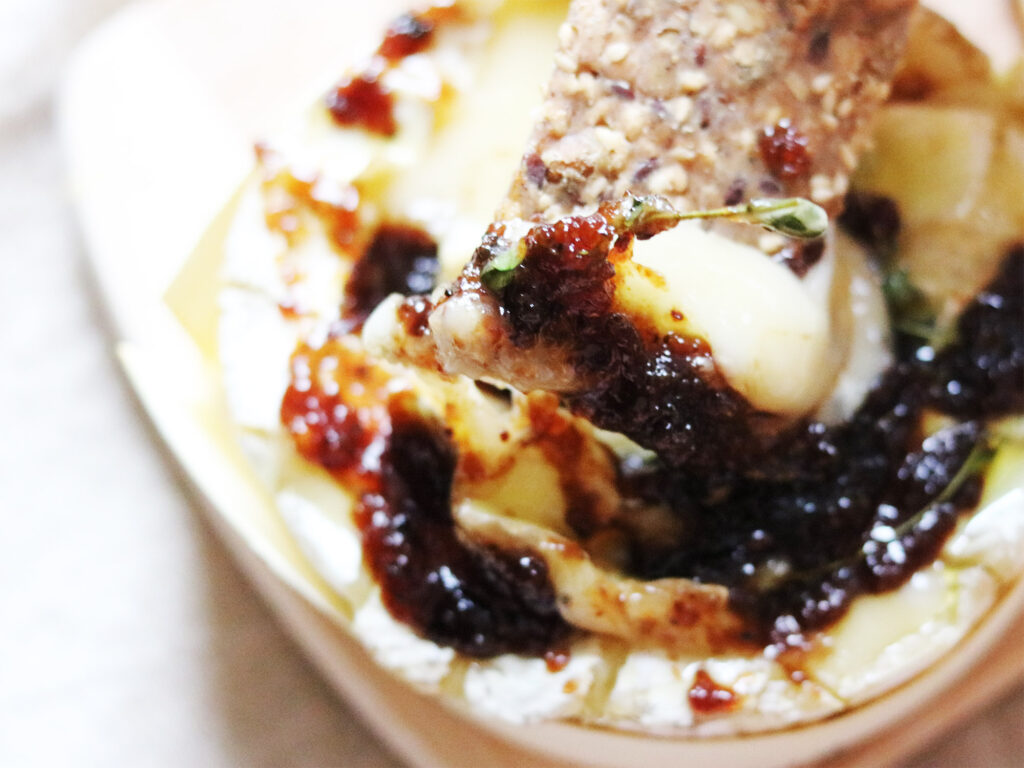
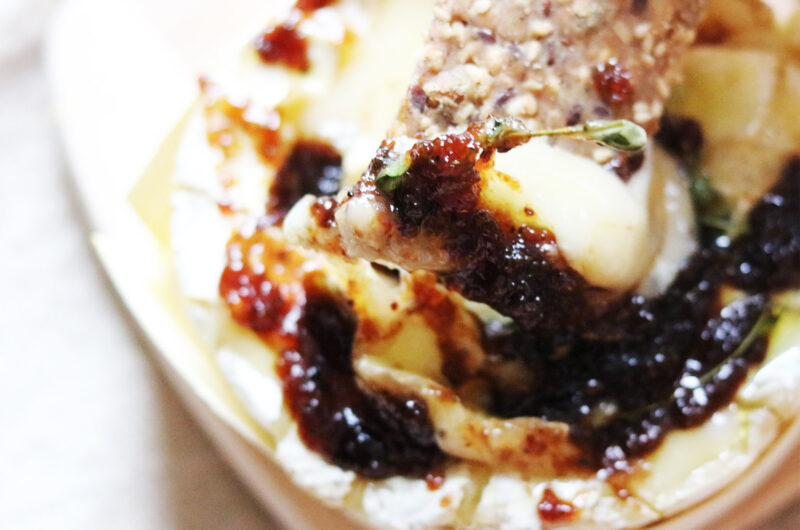
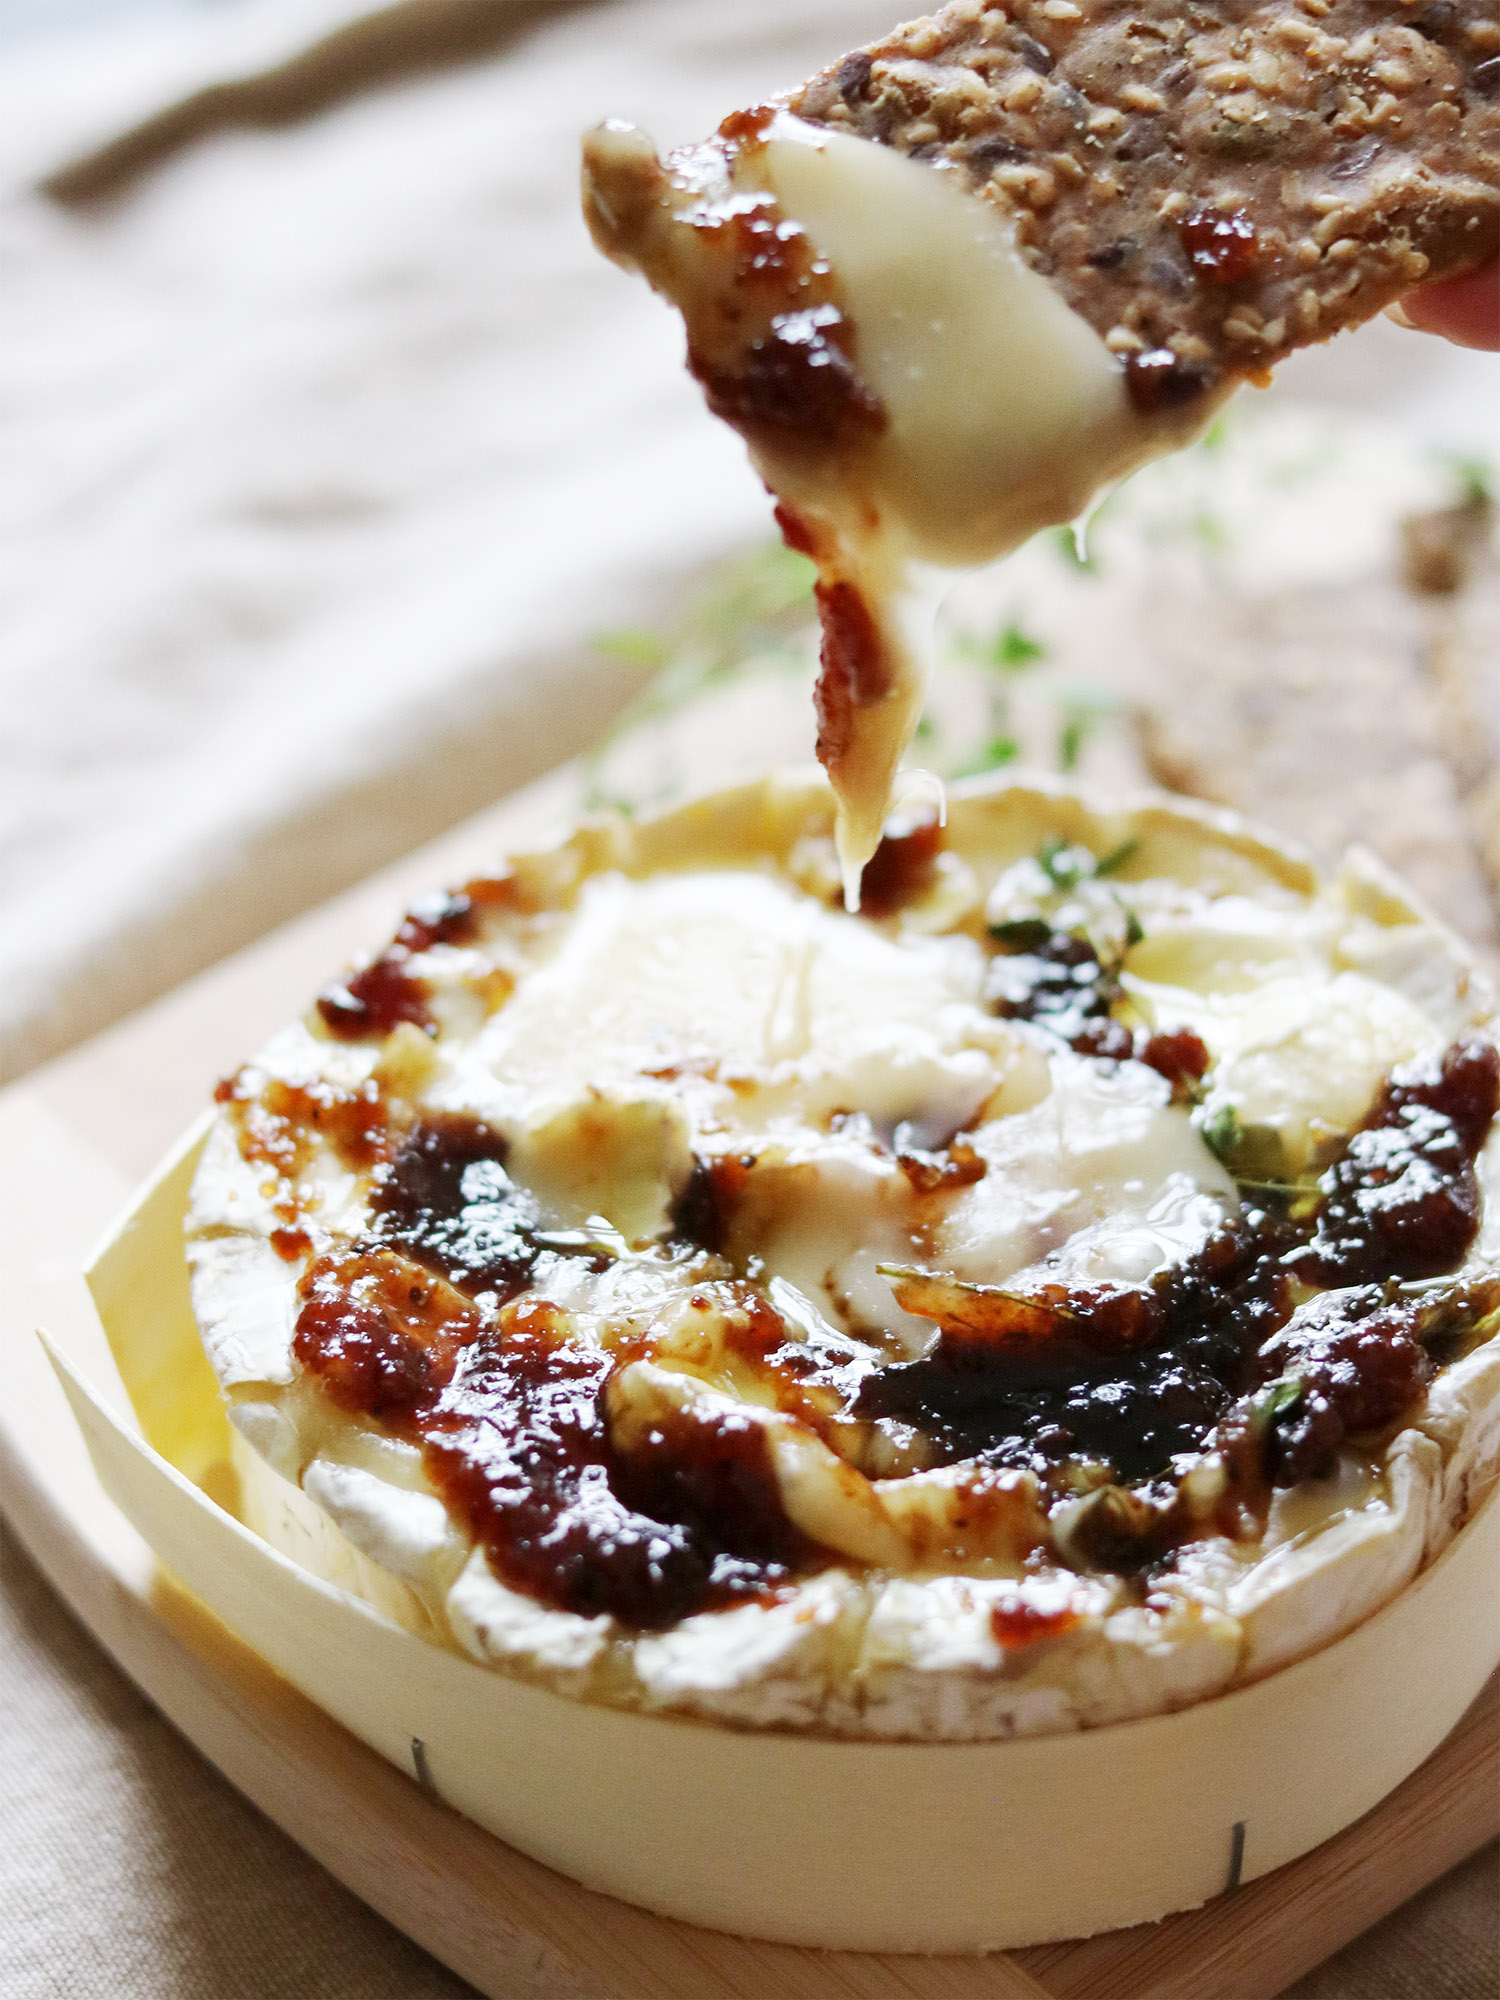
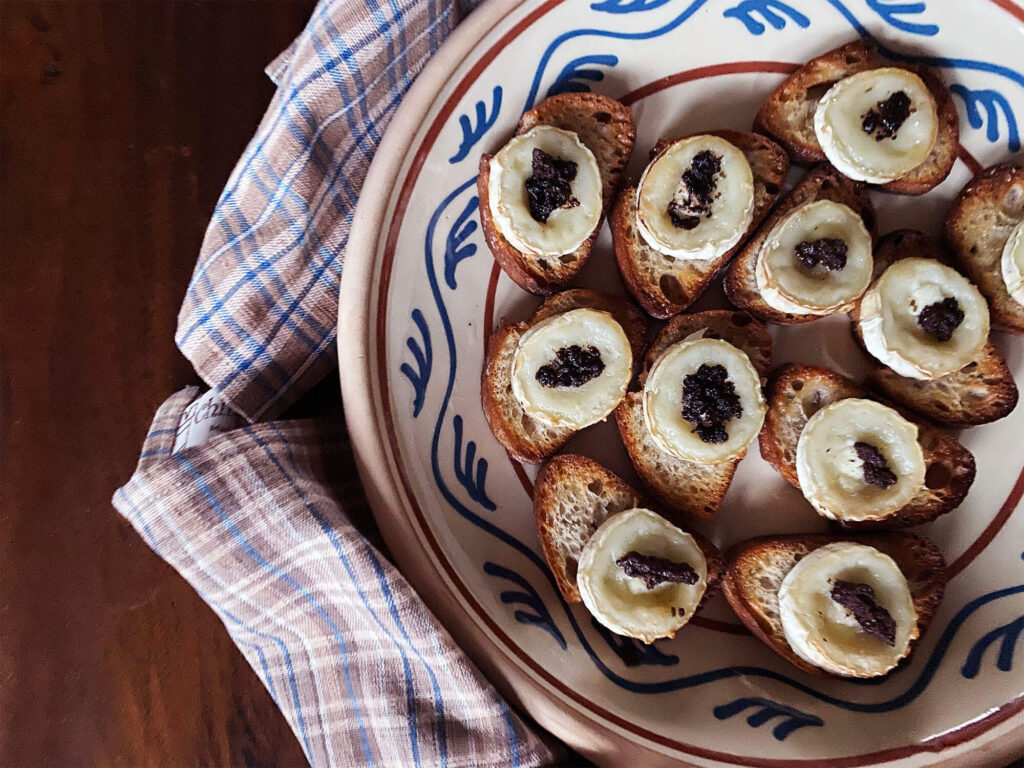
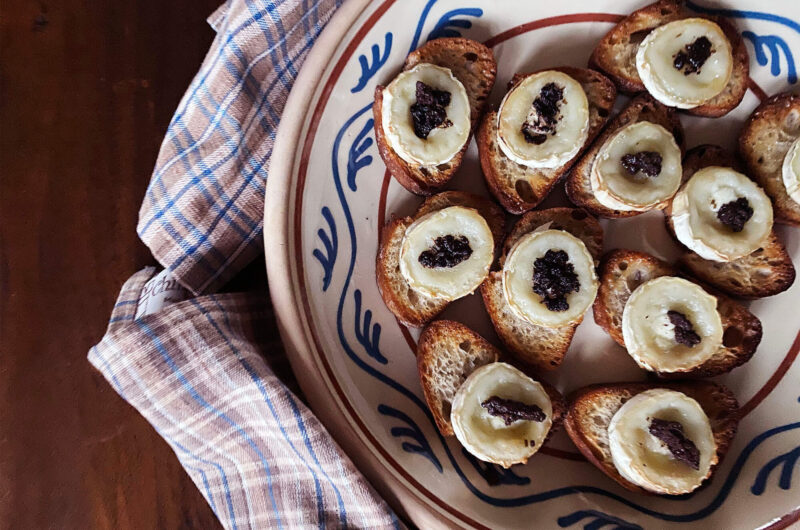
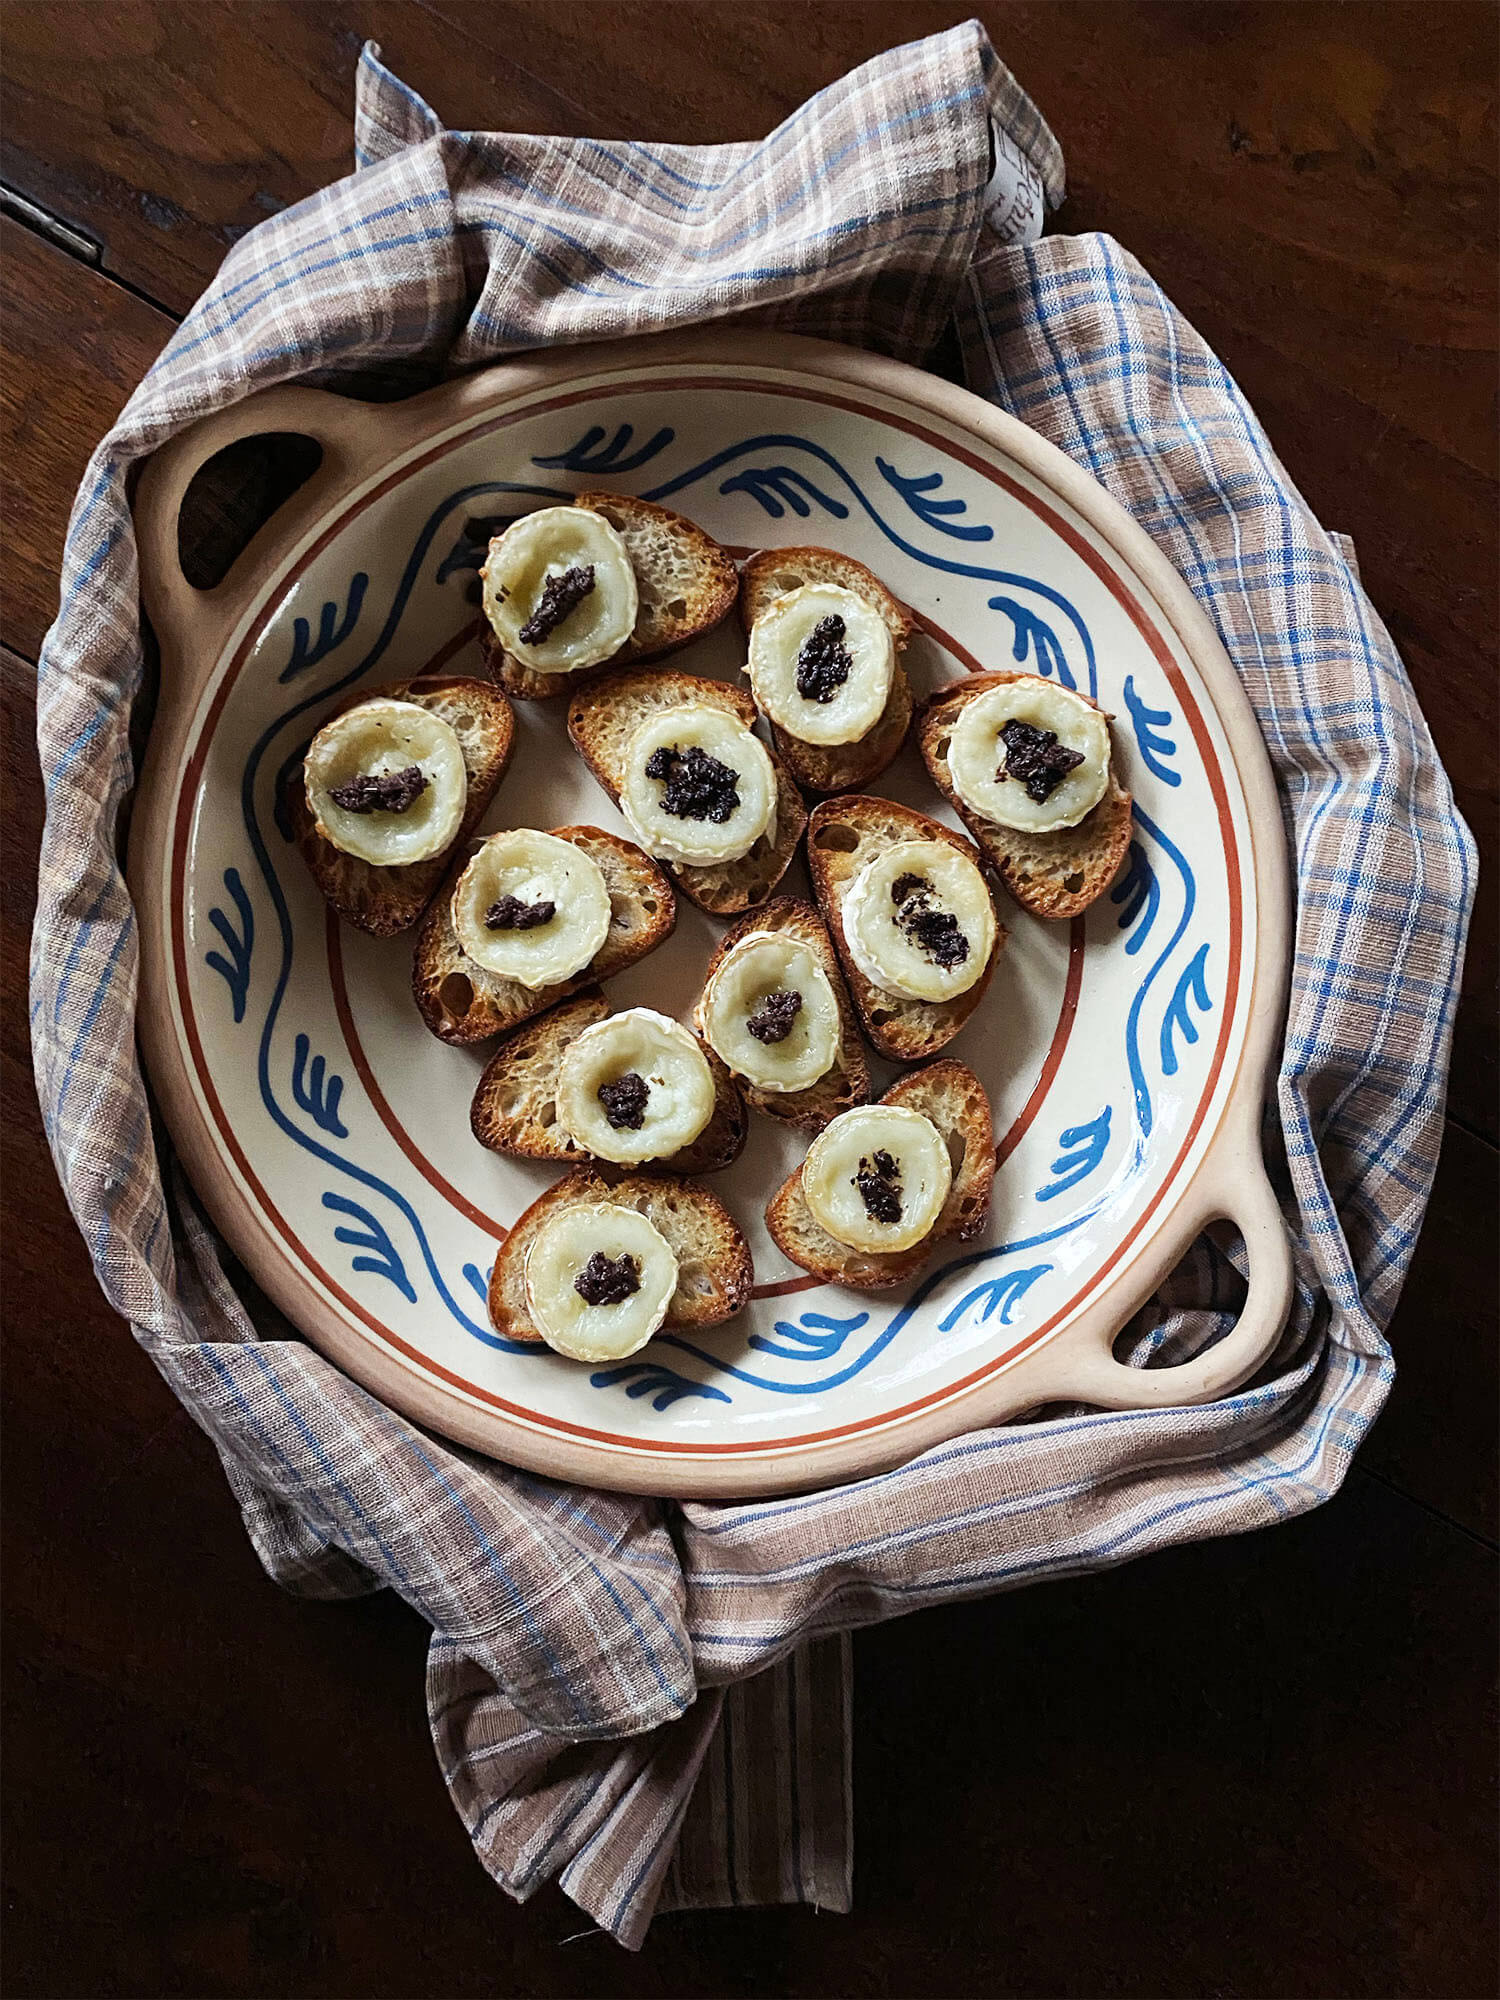
Baked camembert is a great addition to any cheese board, and it is particularly delicious paired with the savory orange marmalade from Spread-mmms which, in addition to orange, has notes of garlic, thyme, and olives.
Try to find a camembert that comes in a wooden box. If your camembert does not come in a box, you can bake it in a small oven-proof dish or wrapped in parchment paper. Serve it straight from the oven with multi-seed crackers to dip in the warm, creamy cheese.
Notes
In the photos for this recipe, we’re using Spread-mmms Savory Orange Marmalade but you can use any sweet or savory marmalade of your choice.
Depending on which flavors you’re after, you can also add a drizzle of honey, a couple of crushed garlic cloves, fresh herbs, or nuts.
Serve the camembert with crackers or toasted baguette on the side, so you can easily scoop up all that delicious melted cheese.
Recipe: Baked Camembert with Savory Orange Marmalade
1
CamembertIngredients
1 camembert wheel (preferably in a wooden box)
1 tablespoon olive oil
2 tablespoons savory orange marmalade from Spread-mmms
Fresh herbs (suggestion: thyme, oregano or rosemary). Adjust quantity to preference.
Directions
- Preheat the oven to 350°F (180°C)
- If the camembert comes in a wooden box, remove any plastic or paper packaging and place the cheese back into the base of the box. If your camembert does not come in a box, you can bake it in a small oven-proof dish or wrapped in parchment paper.
- With a sharp knife, score the top of the camembert in a crisscross pattern, allowing the herbs to infuse the cheese.
- Drizzle the olive oil over the scored camembert.
- Place the camembert (in its box or dish) on a baking sheet to guard against any leaking cheese.
Bake in the preheated oven for 15-20 minutes, or until the cheese is turning golden on top and is melted and soft inside. - Spread the marmalade evenly over the Camembert, or serve it on the side.
Serve immediately with crackers or baguette.


")


