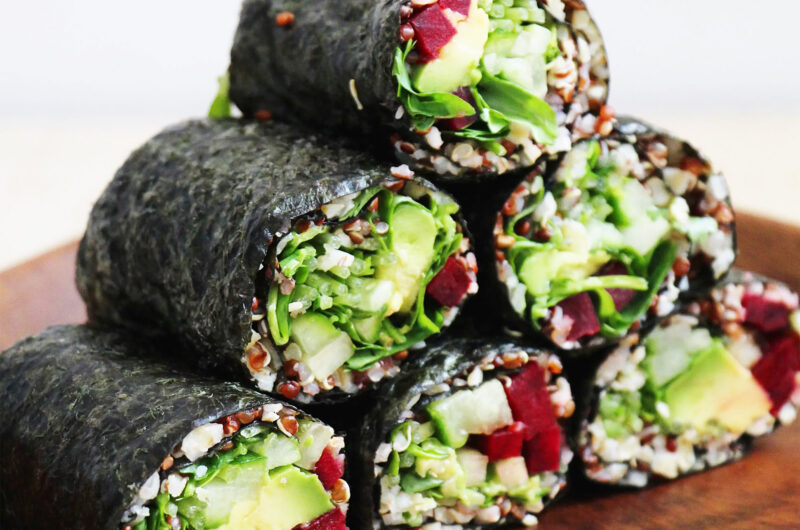
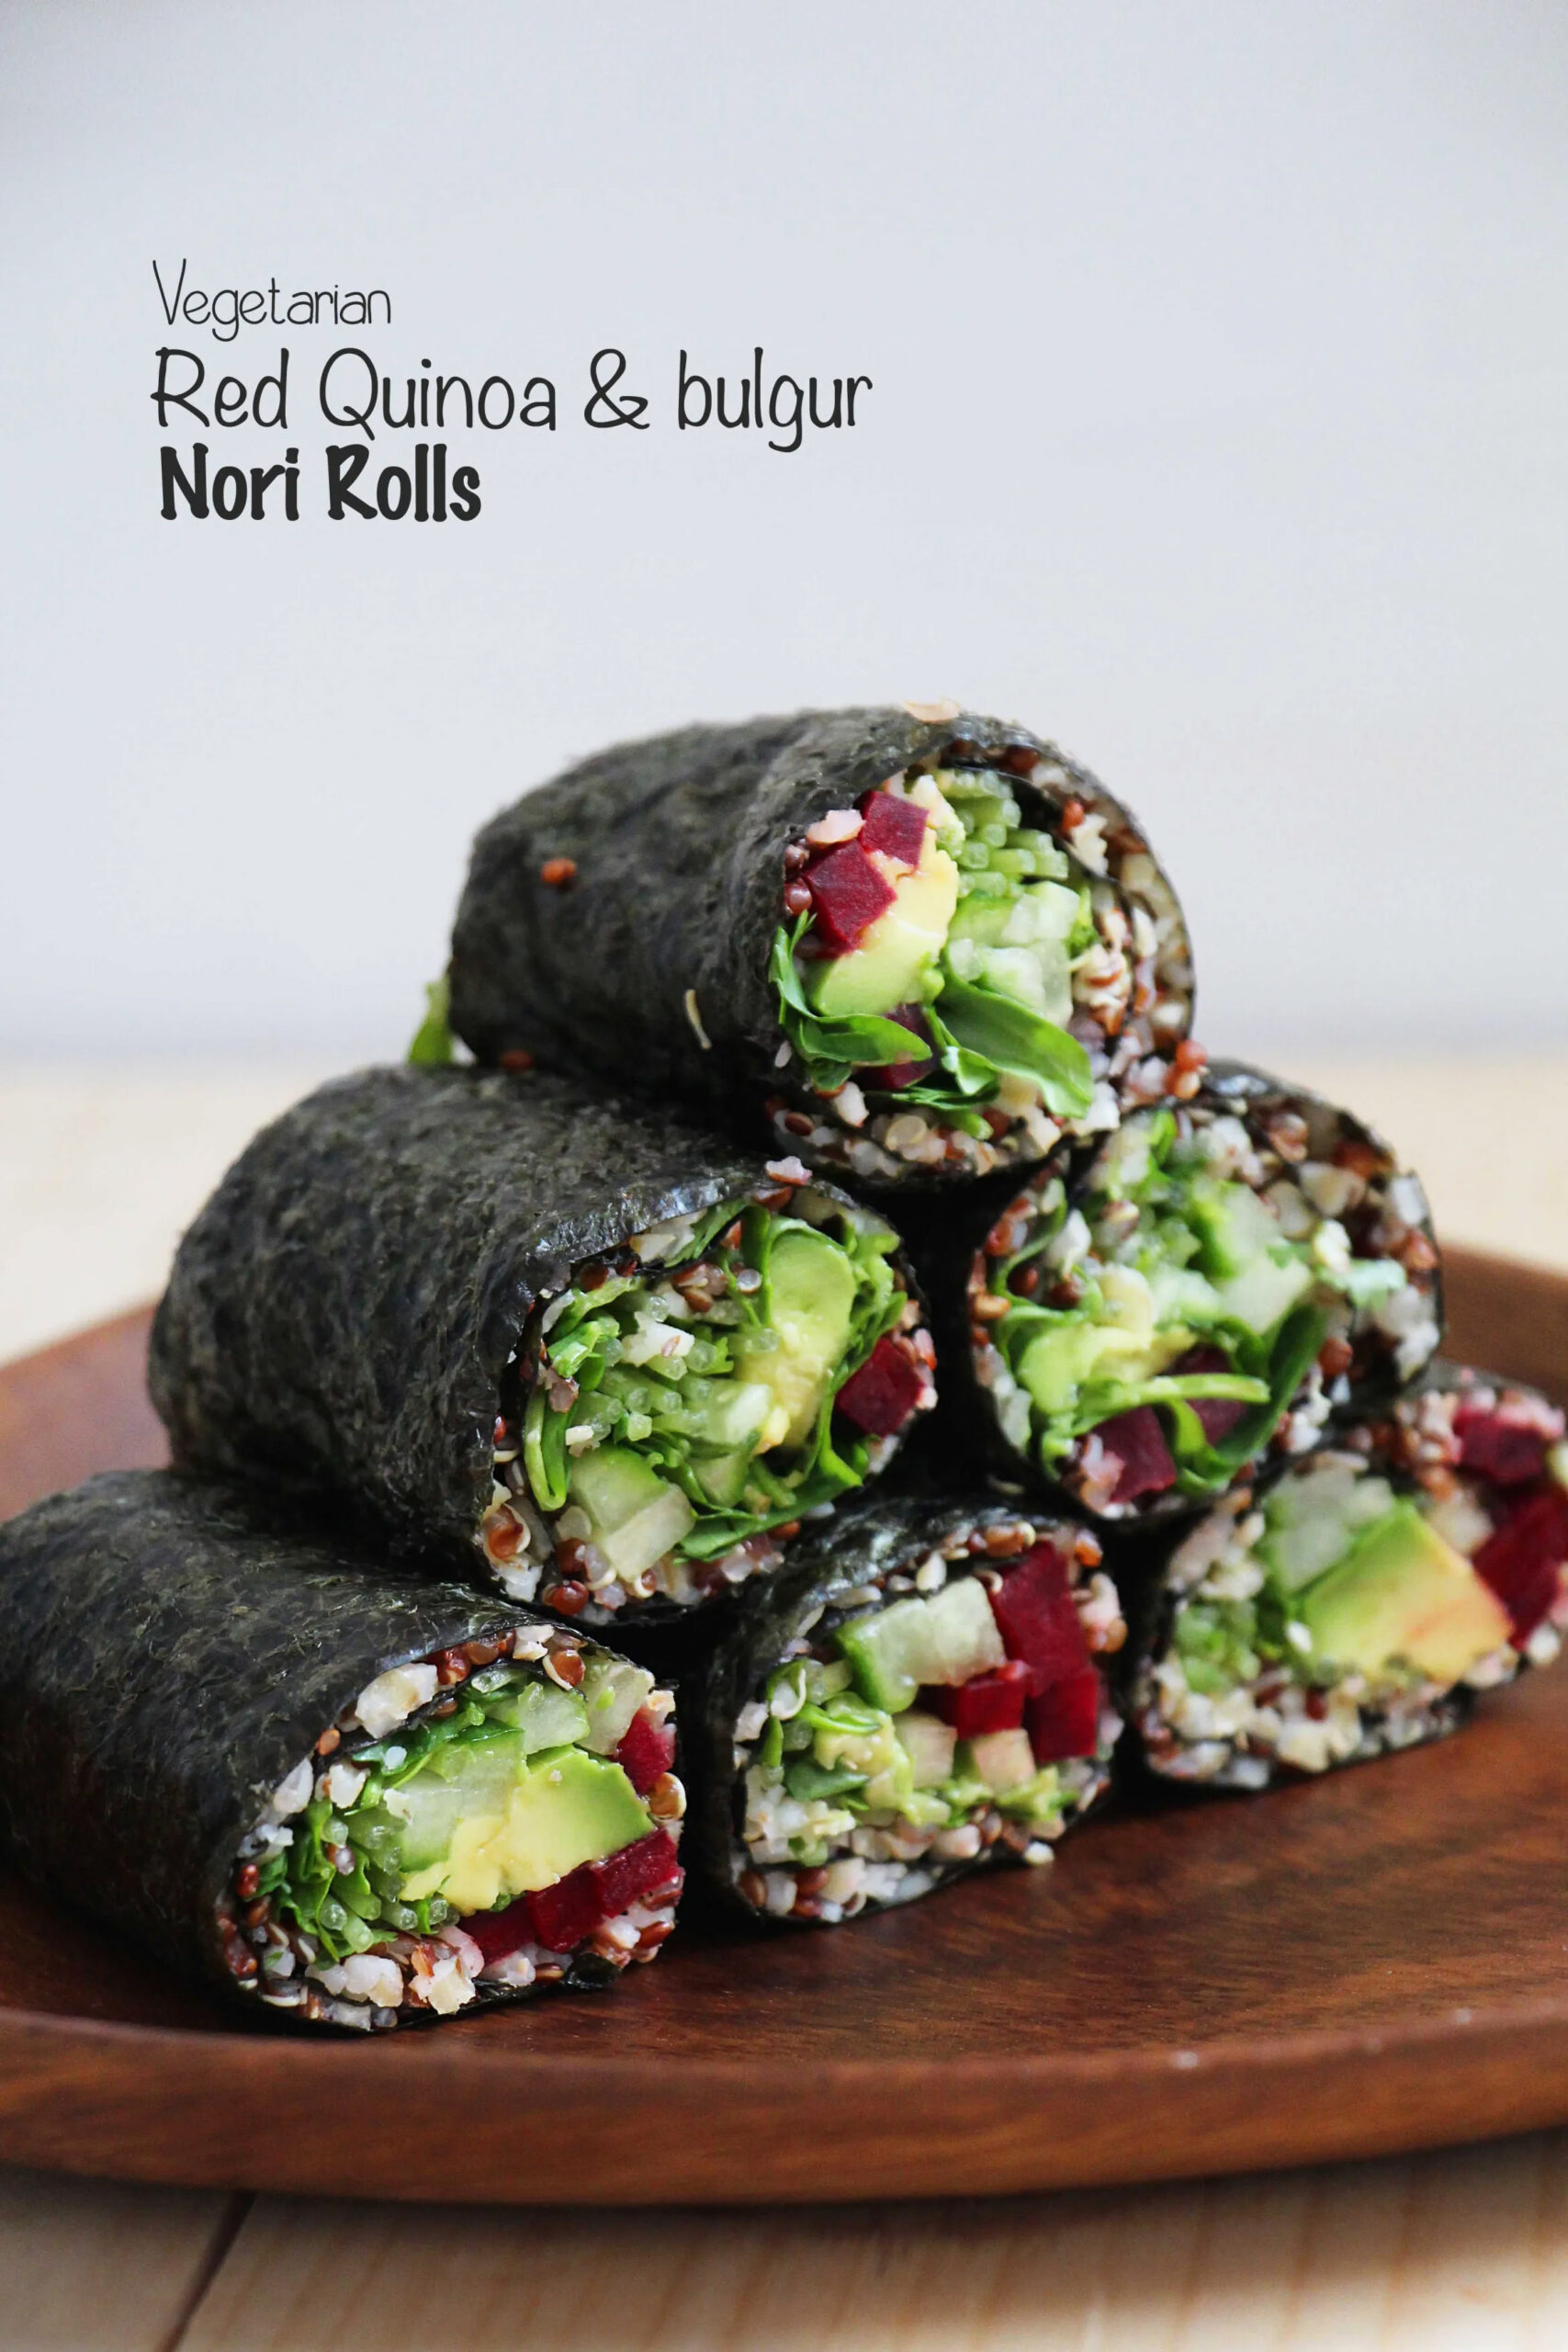
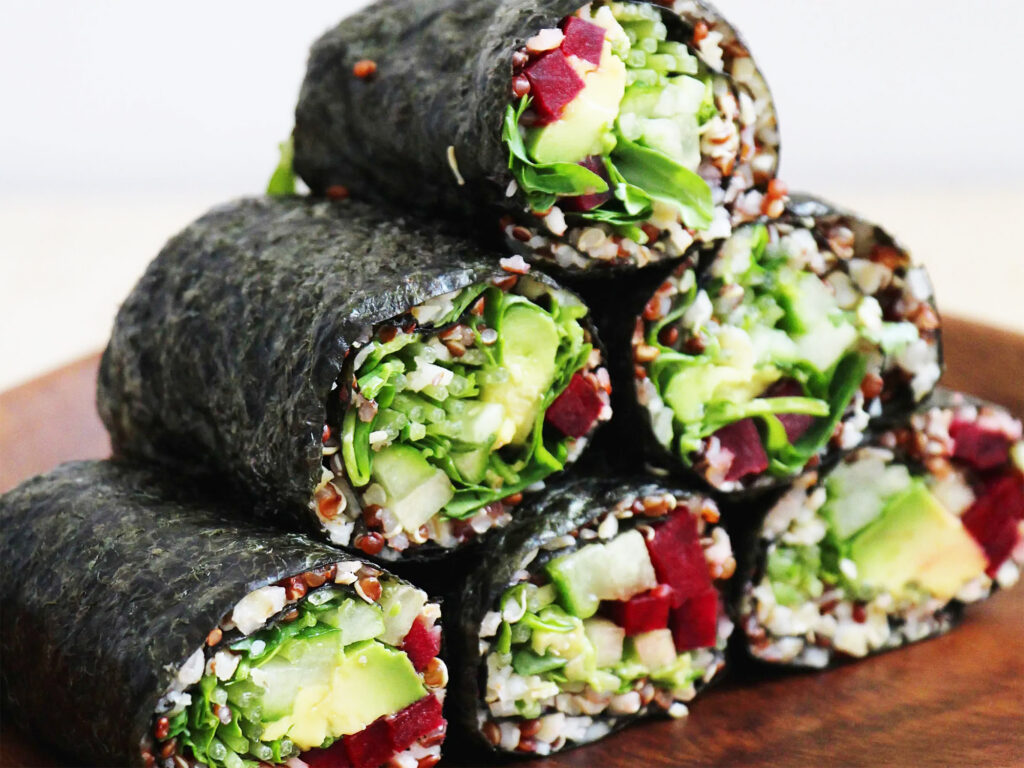
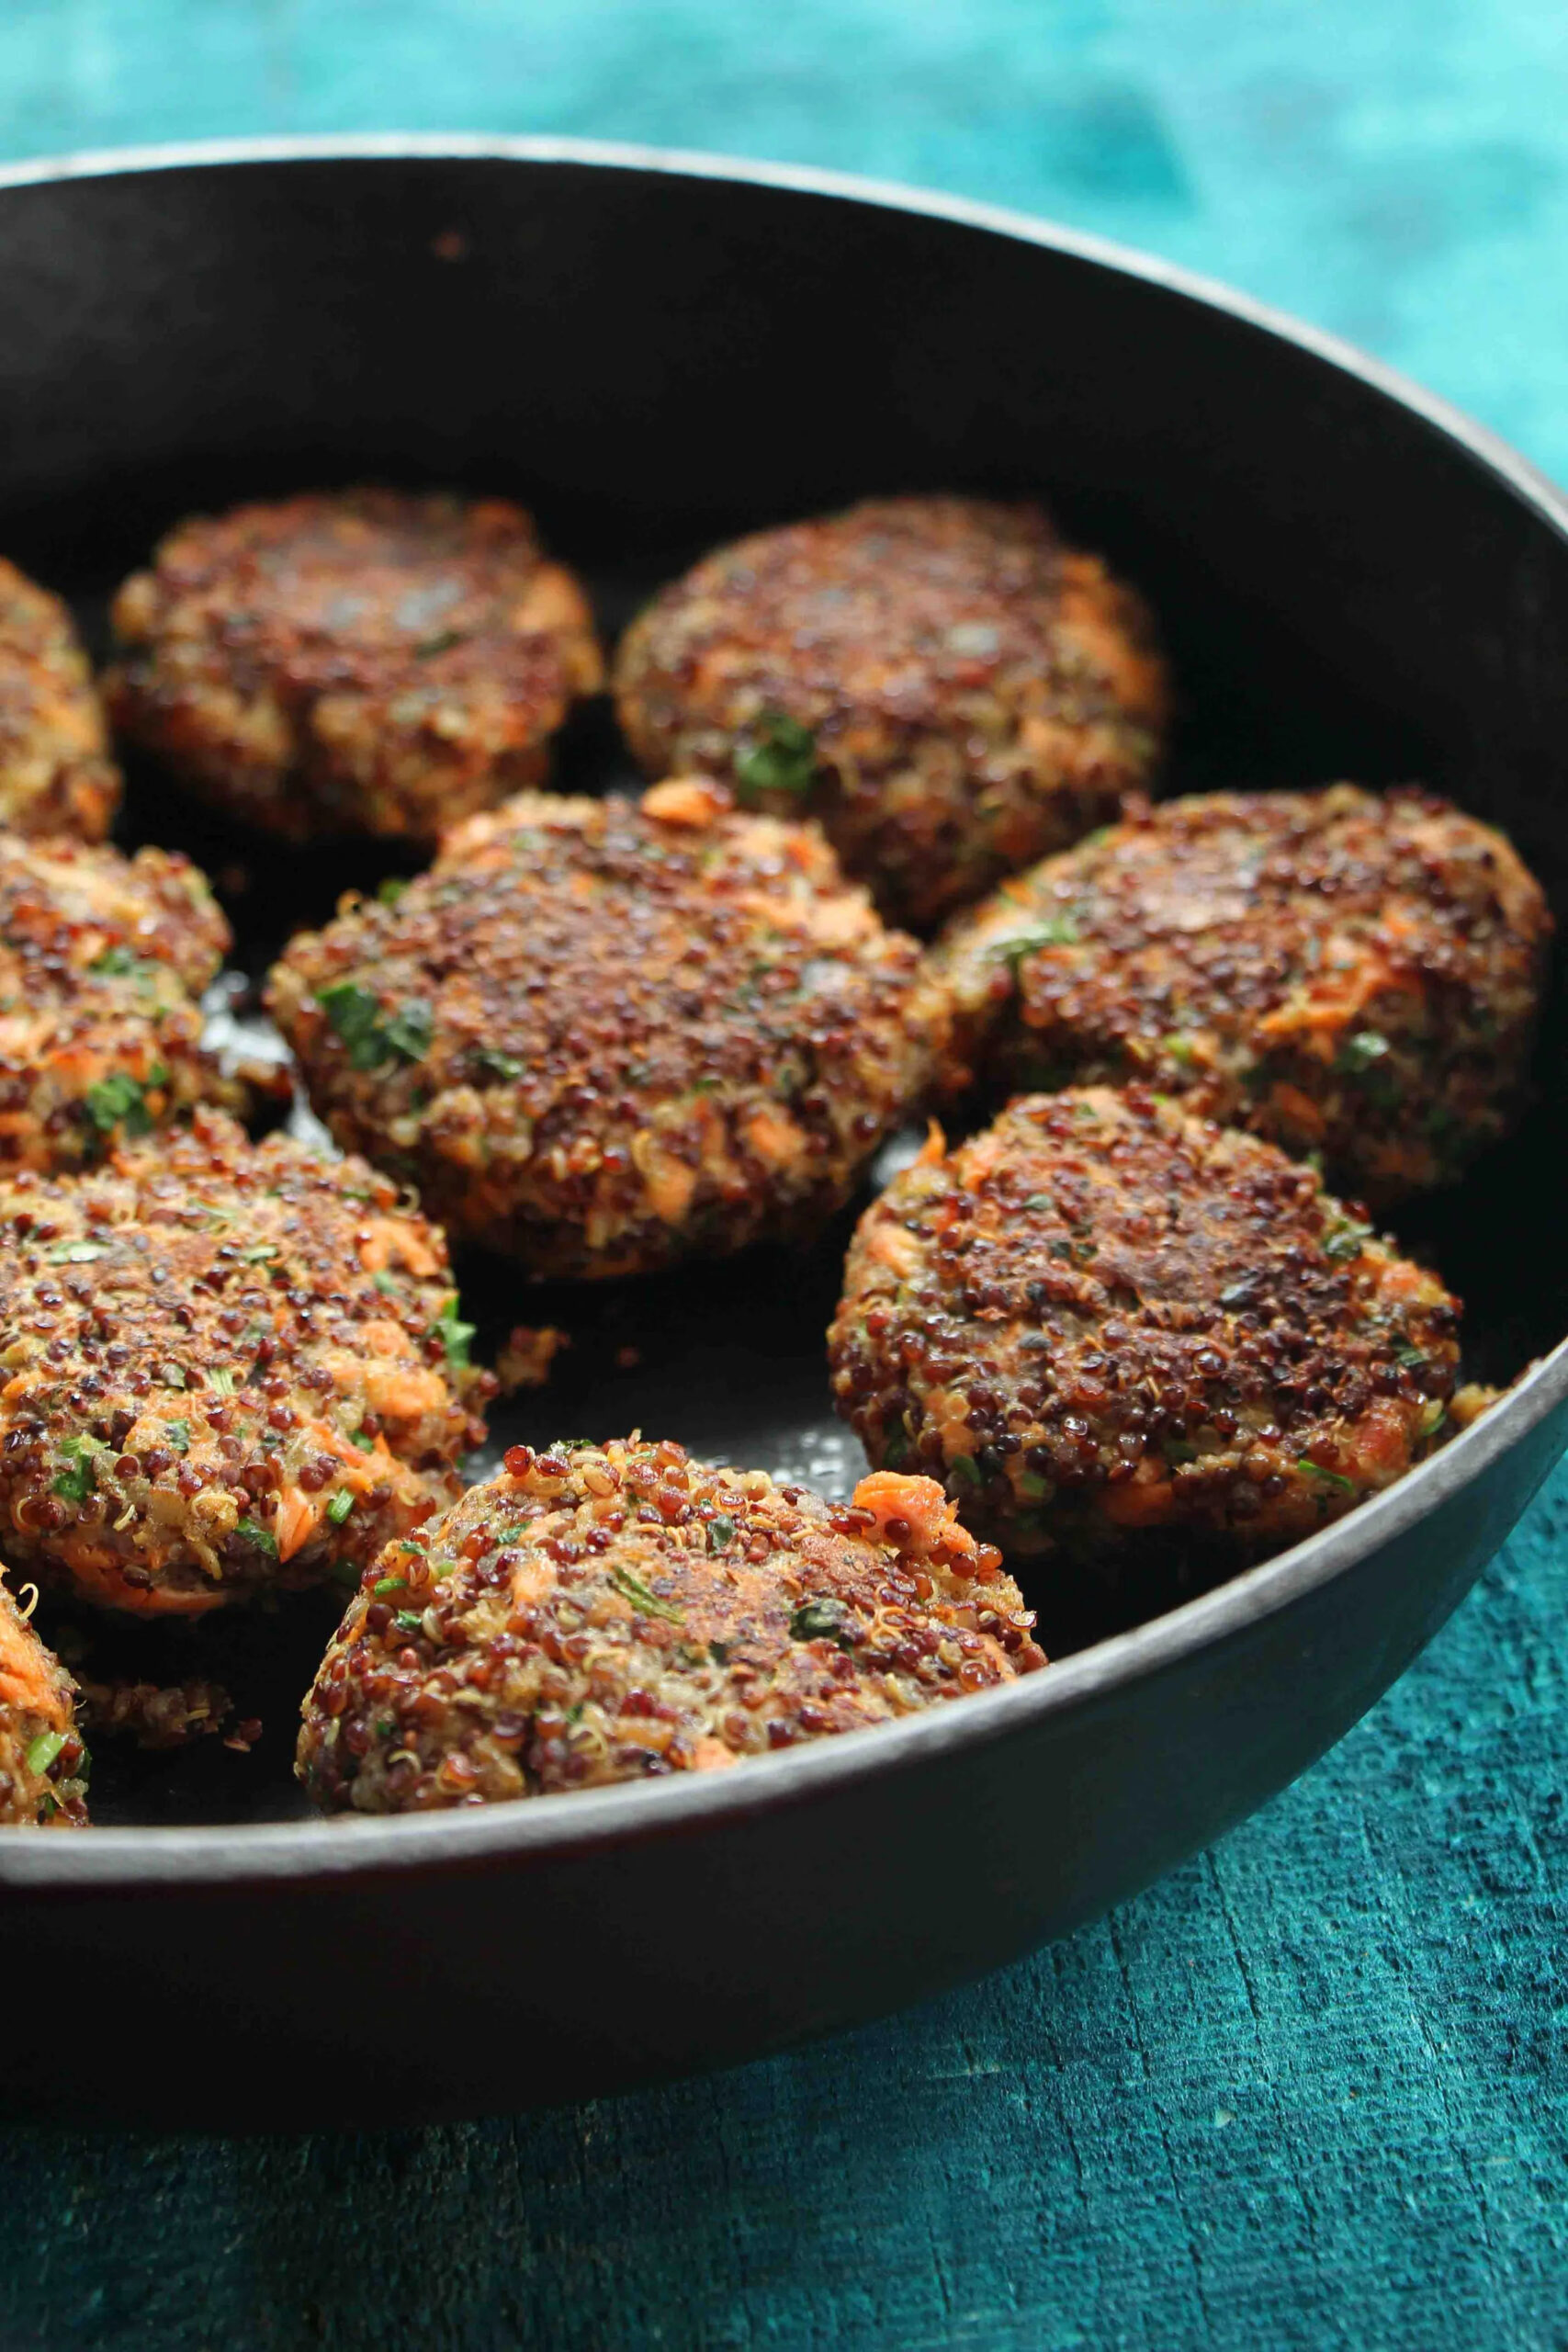
Tina: The Quinoa & Bulgur Nori Rolls are a simple, yet nutritious snack that brings together a mix of flavors and textures. Using bulgur as a base complements the subtle, nutty flavor of red quinoa, a grain known for its protein richness and health benefits.
The addition of fresh beet slices offers a crunchy element, balancing out the softness of the grains, and adding a natural burst of color. If you’re seeking a wholesome, vegetarian snack, you should give these rolls a try. In the recipe below I suggest that you use soy sauce for dipping, but you can use all sorts of dipping sauces such as hoisin sauce, goma sauce or sweet chili sauce.
Recipe by 2 Hungry Birds – TinaCourse: LunchCuisine: Asian
Servings
4
servings
These rolls are a perfect choice for a healthy vegetarian meal. I used bulgur since it’s a great substitute for rice and because I love the texture.
Ingredients
Stuffing ingredients
½ cup ½ bulgur
½ cup ½ red quinoa
1tablespoon1red wine vinegar
Dressing ingredients
3tablespoons3mayonnaise
1teaspoon 1Sriracha (chili sauce)
Vegetable ingredients
1package1Nori seaweed (for sushi)
1package1pea sprouts
11avocado, cut into strips
4inches4cucumber, cut into strips
½ ½ medium-large beet (uncooked), cut into strips
1handful1cilantro
Dipping
soy sauce for dipping
Directions
Place the bulgur in a medium-sized bowl, and pour 1 cup of boiling water over the bulgur with a dash of salt. Place a pot lid or plate over the top of the bowl to create a seal. Let the bulgur absorb the water completely. This might take 15-20 min. depending on how tight fitting your plate/lid is.
Boil the red quinoa in a small pot with 1 cup of water and a dash of salt under a lid. Turn the heat off once the water has evaporated and let sit, covered, on the stove for another 15 min.
In a medium bowl, mix the bulgur and red quinoa together with red wine vinegar. Set aside.
Mix the mayonnaise and Sriracha in a small bowl.
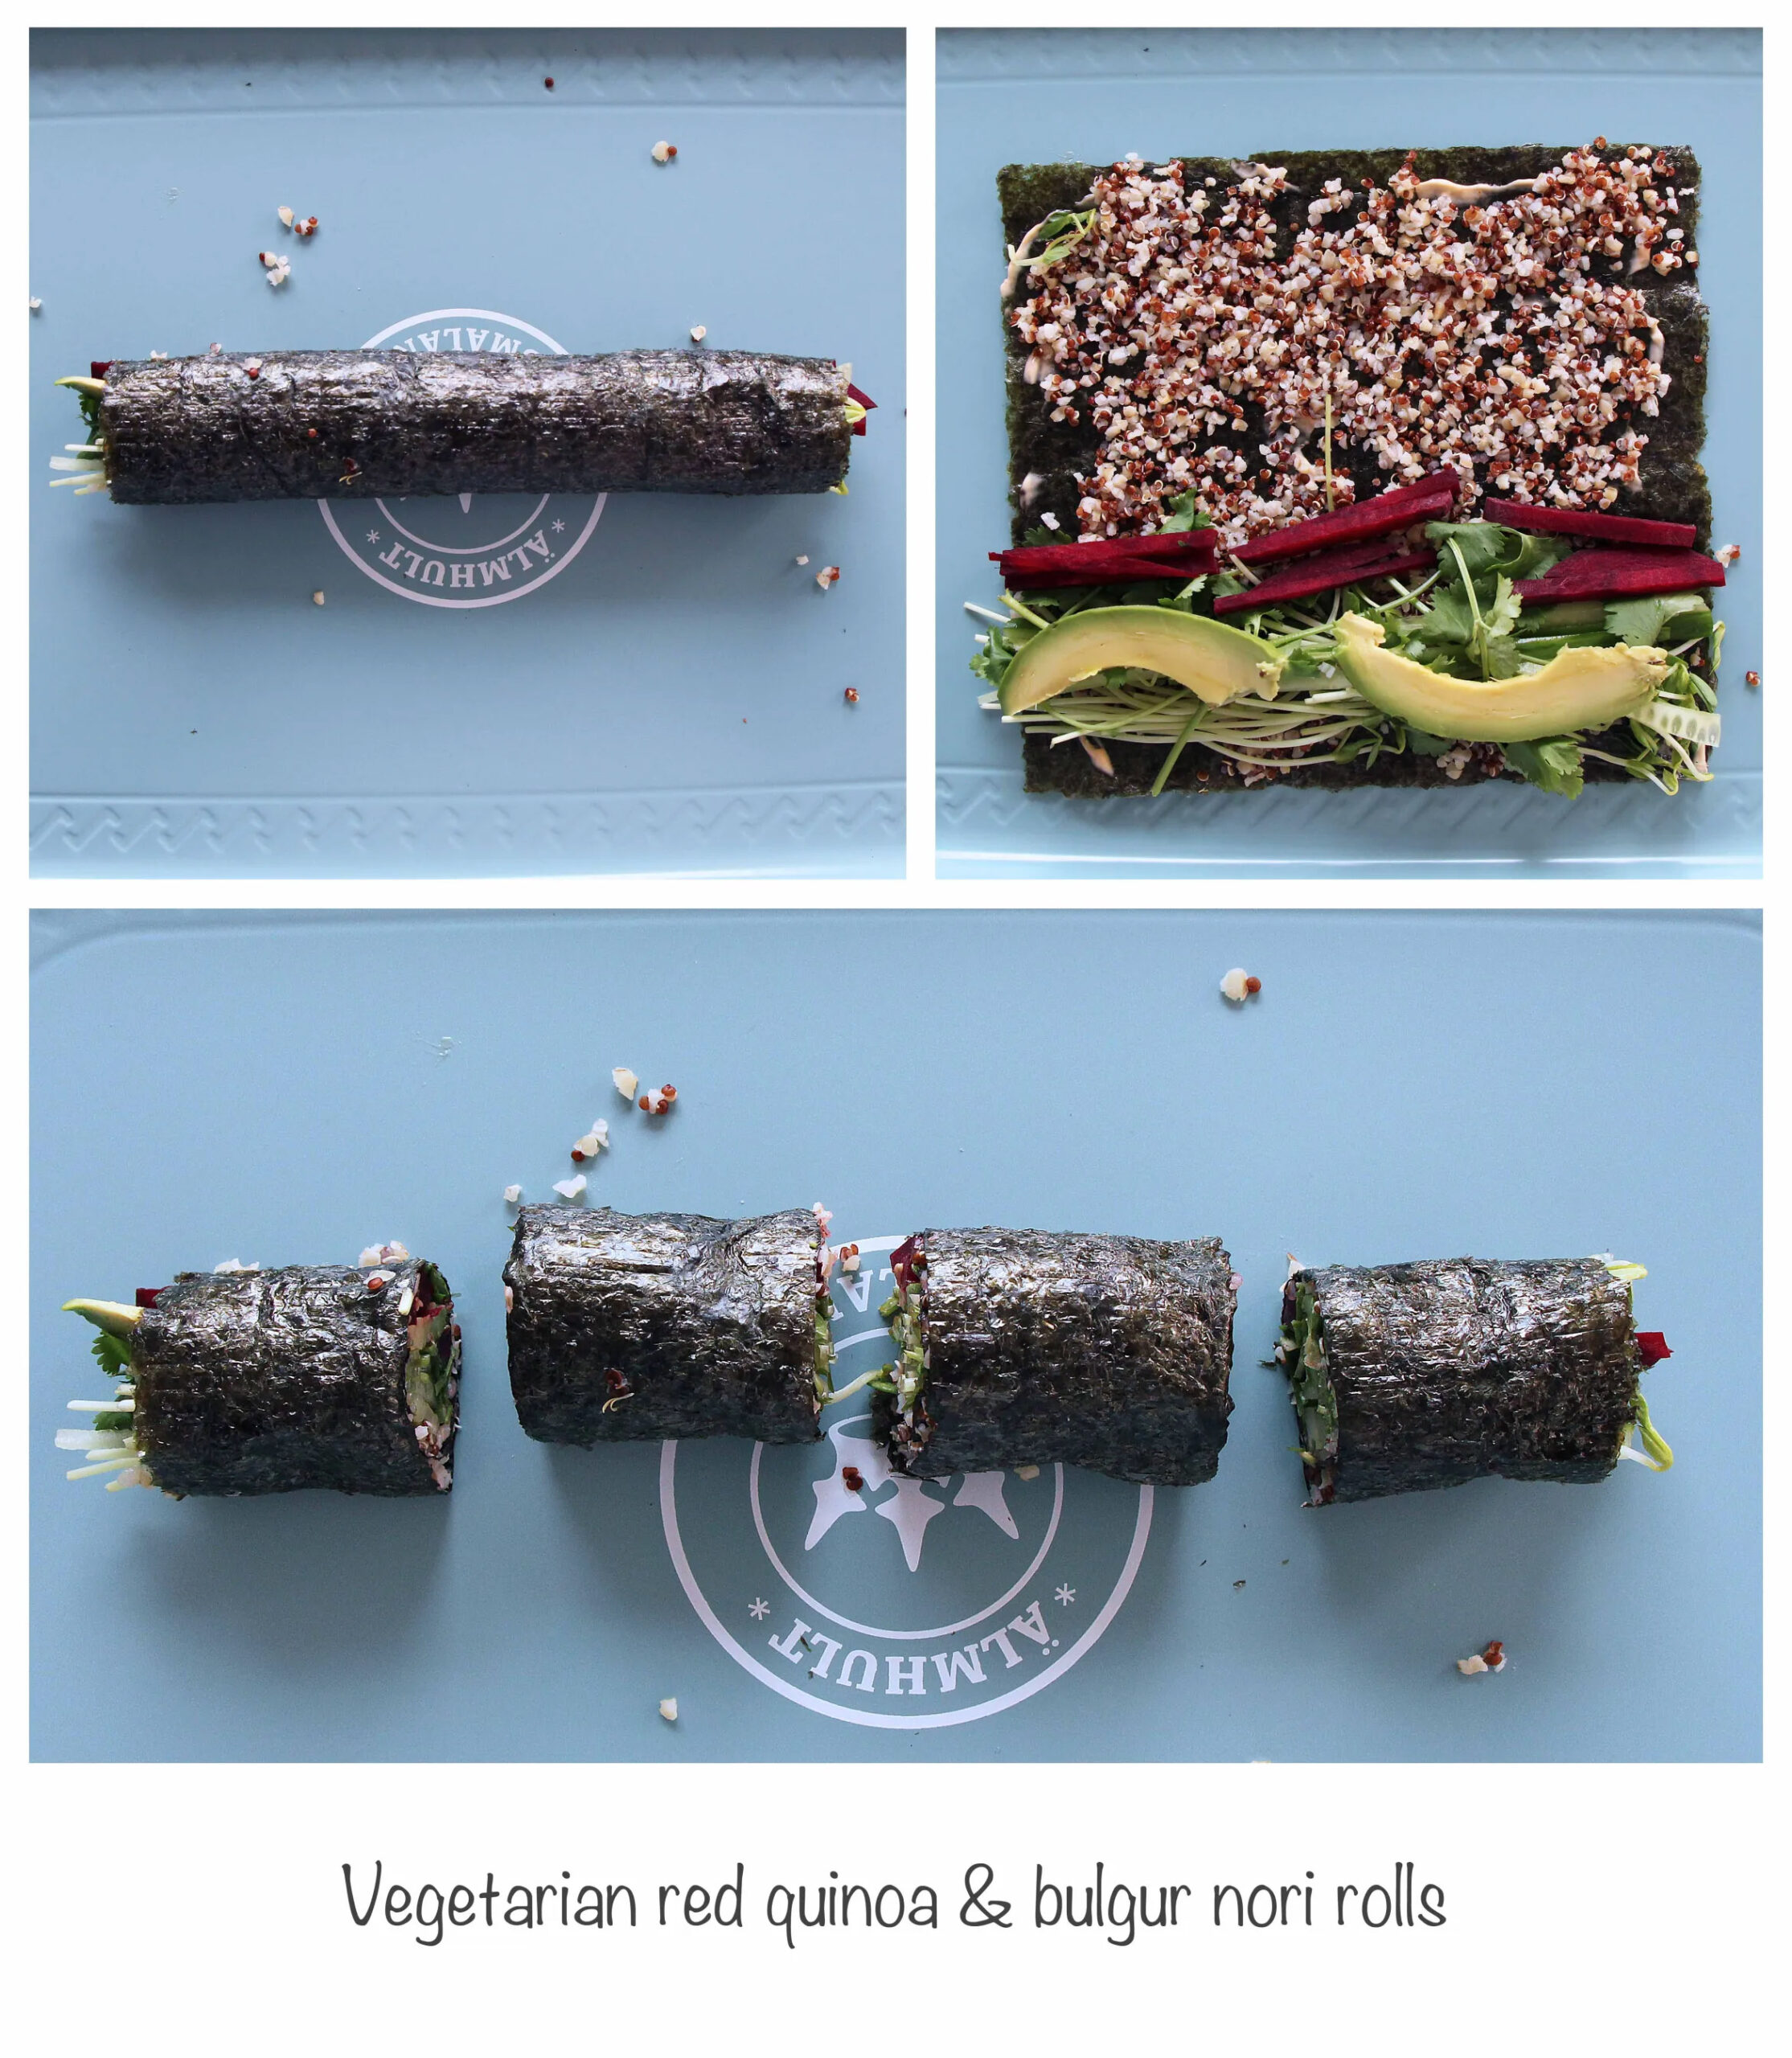
Assemble the rolls starting with a sheet of seaweed and spread a very thin layer of Sriracha mayonnaise on top. Drizzle the bulgur and quinoa mix on top. This will help the bulgur and quinoa stick better to the seaweed since it is a loose mixture compared to typical sticky sushi rice.
Place the pea sprouts, avocado, cucumber, beets and cilantro on one end and roll it tight. Cut the roll into 4 equal pieces. Continue with the remaining rolls.
When finished rolling, serve as finger food with a dipping bowl of soy sauce on the side.
During a recent stay at a vacation house with a group of friends, we put our culinary skills together and hosted an over-the-top potluck style feast. I came home with some great leftover salmon and new inspiration from my friends’ cooking.
I really hate to waste food, so I try and incorporate my leftovers into new dishes whenever I can. I made this recipe with the salmon and a few other things I found in my fridge. The dish turned out great so I had to share it with you.
During a recent stay at a vacation house with a group of friends, we put our culinary skills together and hosted an over-the-top potluck style feast. I came home with some great leftover salmon and new inspiration from my friends’ cooking. I really hate to waste food, so I try and incorporate my leftovers into new dishes whenever I can. I made this recipe with the salmon and a few other things I found in my fridge. The dish turned out great so I had to share it with you.
Ingredients
½cup ½quinoa
3tablespoons3parsley, finely chopped
7oz7(200g) cooked salmon (leftover), torn into smaller pieces
½cup ½bread crumbs
½cup ½Parmesan cheese
½ teaspoon ½ salt
Fresh cracked pepper
½teaspoon ½cumin
½teaspoon ½curry powder
2tablespoons2olive oil, for frying
Directions
Cook the quinoa as directed on package and let it cool.
In a large bowl, mix all the above ingredients except for olive oil.
Shape them into small patties and make sure to squeeze them tightly to prevent them from falling apart during cooking.
Heat olive oil in a pan on medium high heat and add the patties. Sauté until browned on each side.
Serve with simple arugula salad and a few slices of avocado.
I have heard a lot about arepas from my Venezuelan friend Indira – she has promised for years to make them for me. She finally made them recently and they have fascinated me ever since.
Arepas originated in Venezuela, and are used prominently in modern day cuisine of Venezuela, Colombia, and in other Latin American countries. They look somewhat like pita bread, but are typically made of precooked corn flour and fried on a skillet instead of baked in the oven. They are served very hot and you can fill them with a little butter and grated cheese, which is the simple and traditional way of serving them. Arepas are also great if you are on a gluten free/heart healthy diet. If you are on a low sodium diet then don’t add the salt to the dough and of course adjust your stuffing to your diet.
Arepas should be easy to make, as they consist only of 4 simple ingredients. However, the truth is that to make truly great arepas, you need to know a few tricks that you probably won’t pick up from a YouTube video. I was able to finally learn how to make them when Indira’s mother recently visited from Venezuela and I invited myself over.
Arepas are actually incredibly easy to make, once you understand how to deal with the dough. Please note that the corn flour dough does not respond in the same way as regular white flour dough. The best corn flours to make arepas are labeled P.A.N., and are available in most supermarkets in New York and elsewhere. It is important that the dough is not too dry or it will crack around the edges when you shape the arepas. It is also important to know that corn meal absorbs water slower than regular wheat flour.
Arepas are pretty filling depending on your stuffing, so 2 arepas per person should be enough.
Recipe by Indira – Tina’s friendCourse: BakingCuisine: Venezuela
Servings
4
arepas
Arepas are actually incredibly easy to make, once you understand how to deal with the dough. Please note that the corn flour dough does not respond in the same way as regular white flour dough. The best corn flours to make arepas are labeled P.A.N., and are available in most supermarkets in New York and elsewhere. It is important that the dough is not too dry or it will crack around the edges when you shape the arepas. It is also important to know that corn meal absorbs water slower than regular wheat flour.
Ingredients
250g250g (just over 1 cup) of warm water
1teaspoon1salt
1teaspoon1 sunflower oil for the dough
1teaspoon1sunflower oil for the skillet
Approximately 135 grams (0.3 lbs/ a little under a cup) Harina P.A.N. pre-cooked corn flour (save a little of the flour after for later)
Directions
Fill a bowl with hot water, salt and oil.
Add the corn flour to the water little by little. Make sure to save a little of the flour for later. Gather and mix the dough with your fingers. The dough should be soft and on the moist side.
Let the dough rest for about 10 minutes to give it time to absorb the water. If the dough is too wet and difficult to shape, add a little more flour to the dough.
Heat the skillet on a medium-high heat. Meanwhile, divide the dough into 4 portions and shape one portion of the dough at a time. Roll the dough in your palms so it almost shapes into a ball. Press the dough slightly flat between your two palms and then use both your palms to rotate, and shape the dough into a pita bread shape. Pat the sides while shaping a bit and continue until the dough is about ½ inch thick.
Add a little oil to your skillet and spread it evenly across the skillet using a piece of paper towel. Place the shaped dough portions on the hot skillet and allow them to cook until they become golden, about 10 minutes – then flip your arepas and cook the other side. Once both sides are cooked, they are ready to serve.
Arepas should be served hot (you can fold them into a clean dishcloth to keep the heat) and can be sliced like pita bread or burger buns. Fill your arepas with a little butter and grated cheese or the ingredients of your choosing. The possibilities are endless. I personally like a little avocado/guacamole and chicken in my arepas or for a breakfast version serve them with scramble eggs.
bánh mìthịt nướng (Vietnamese sandwich with grilled pork chop) is my favorite kind of sandwich. It was created in Vietnam during French colonial rule, and has influences from both cultures. The sandwich is typically made with French baguette and pâté, with different variants of Vietnamese meats and ingredients as the filling. The banh mi ‘thit nuong’ (grilled pork chop), however, is at the top of my list.
Unfortunately you can’t just whip this one up on the spot, as it demands a little preparation at least one day in advance. The meat is best marinated the day before, and the ‘do chua’(pickled daikon and carrots) can be made the day before as well – but will be better if it is made the week before.
I usually marinade a bunch of pork chops, have them for dinner the first day, and then use the leftovers for sandwiches the following day. The do chua is generally amazing with rice and meat dishes, and it lasts for about a month in the refrigerator, leaving you plenty of time to nibble.
The picture below is a banh mi stand right around the corner of my grandmother’s house. This woman arrives early every morning and sits there all day long in the blazing hot sun.
Recipe by 2 Hungry Birds – TinaCourse: Lunch, sandwichCuisine: Vietnam
Servings
2
sandwiches
bánh mìthịt nướng (Vietnamese sandwich with grilled pork chop) is my favorite kind of sandwich. It was created in Vietnam during French colonial rule, and has influences from both cultures. The sandwich is typically made with French baguette and pâté, with different variants of Vietnamese meats and ingredients as the filling. The banh mi ‘thit nuong’ (grilled pork chop), however, is at the top of my list.
Ingredients
11thit nuong pork chop, grilled and sliced into smaller pieces
Do chua – pickled daikon and carrots
22sandwich-sized baguettes, the light and fluffy kind
1tablespoon1mayonnaise
A couple of sprigs of cilantro
11jalapeño, seeded and sliced crosswise into smaller pieces
¼¼English cucumber, cut into sticks
Directions
Slice the sandwich bread halfway lengthwise.
Spread some mayo on each side of the sandwich and lay the thit nuong evenly on the bottom of the sandwich.
Add cilantro, jalapeno, cucumber, and do chua on top and close the sandwich. Wrap some sandwich paper around one end for easy eating.
I have never been a big lover of scrambled eggs – they are usually too plain for me. So when I cook eggs, I make frittatas, which are easy to make and have a wonderful flavor.
A frittata is perfect to make when you have friends over for brunch, which I quite often do. Stick it in the oven, and voila! You don’t even have to be in the kitchen while you are entertaining your friends, and the outcome is a beautiful egg dish. In fact, frittatas are so easy to make that you don’t even need a recipe, as long as you have some eggs and a few vegetables to sauté (or even just some herbs)
The photo in this post is of a frittata that was in the oven for a little longer than I intended, since my guests all arrived late. The frittata was still amazing, but I prefer cooking it a little less to create small pockets of melting cheese, which are fabulously mouth melting.
Recipe by 2 Hungry Birds – TinaCourse: Breakfast, Lunch, Brunch
Servings
6
servings
A frittata is perfect to make when you have friends over for brunch, which I quite often do. Stick it in the oven, and voila! You don’t even have to be in the kitchen while you are entertaining your friends, and the outcome is a beautiful egg dish. In fact, frittatas are so easy to make that you don’t even need a recipe, as long as you have some eggs and a few vegetables to sauté (or even just some herbs)
Ingredients
2tablespoons2olive oil
6-8oz6-8white button mushrooms, sliced
11large leek, chopped
¼cup¼milk
33scallions, chopped (save a bit for garnish)
4oz4white sharp cheddar cheese, cut into 1/2 inch x 1/2 inch squares
Salt and pepper
A pinch of thyme
Directions
In a saucepan, heat the olive oil until hot and then add the mushrooms. Sauté until lightly browned, then add salt and pepper and keep sautéing until he mushrooms are well done.
Add the leeks and sauté until edges are slightly charred. Let the vegetables cool off a bit.
In a large bowl, whip the eggs and milk together with salt, pepper and thyme. Add the sautéed vegetables, scallions and cheddar cheese.
Pour the eggs and vegetable mixture in a quiche dish and bake in the oven at 390 °F (200°C) until the top is slightly browned and the egg mixture is baked.