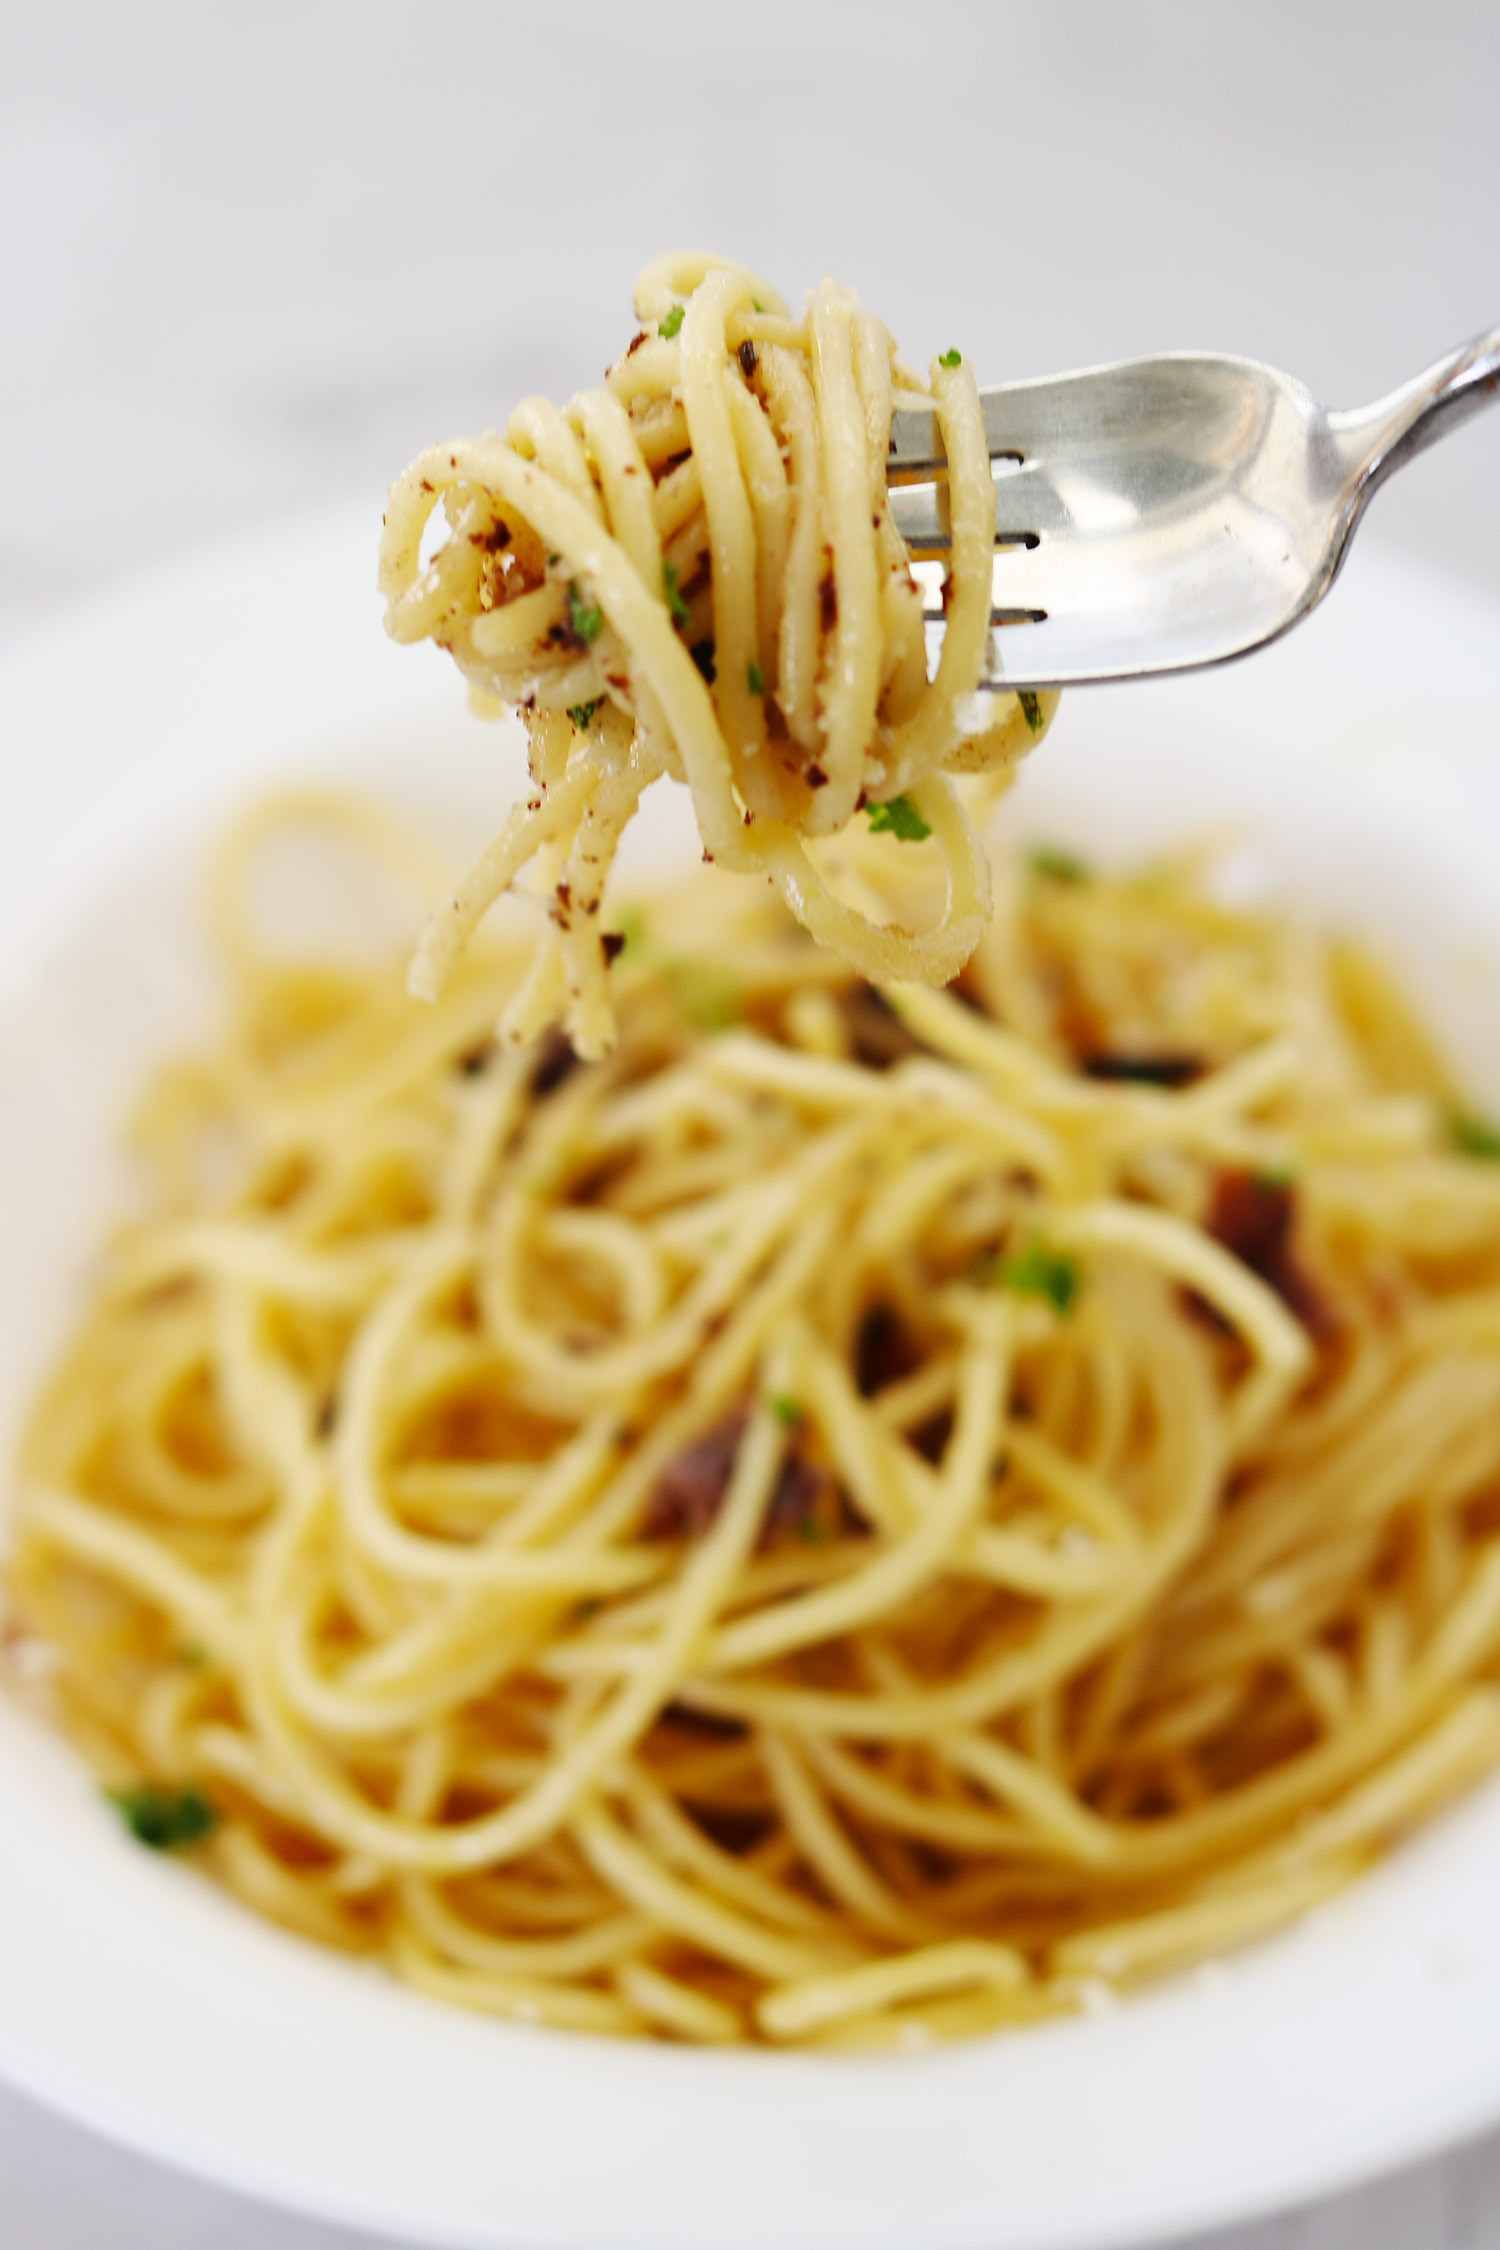
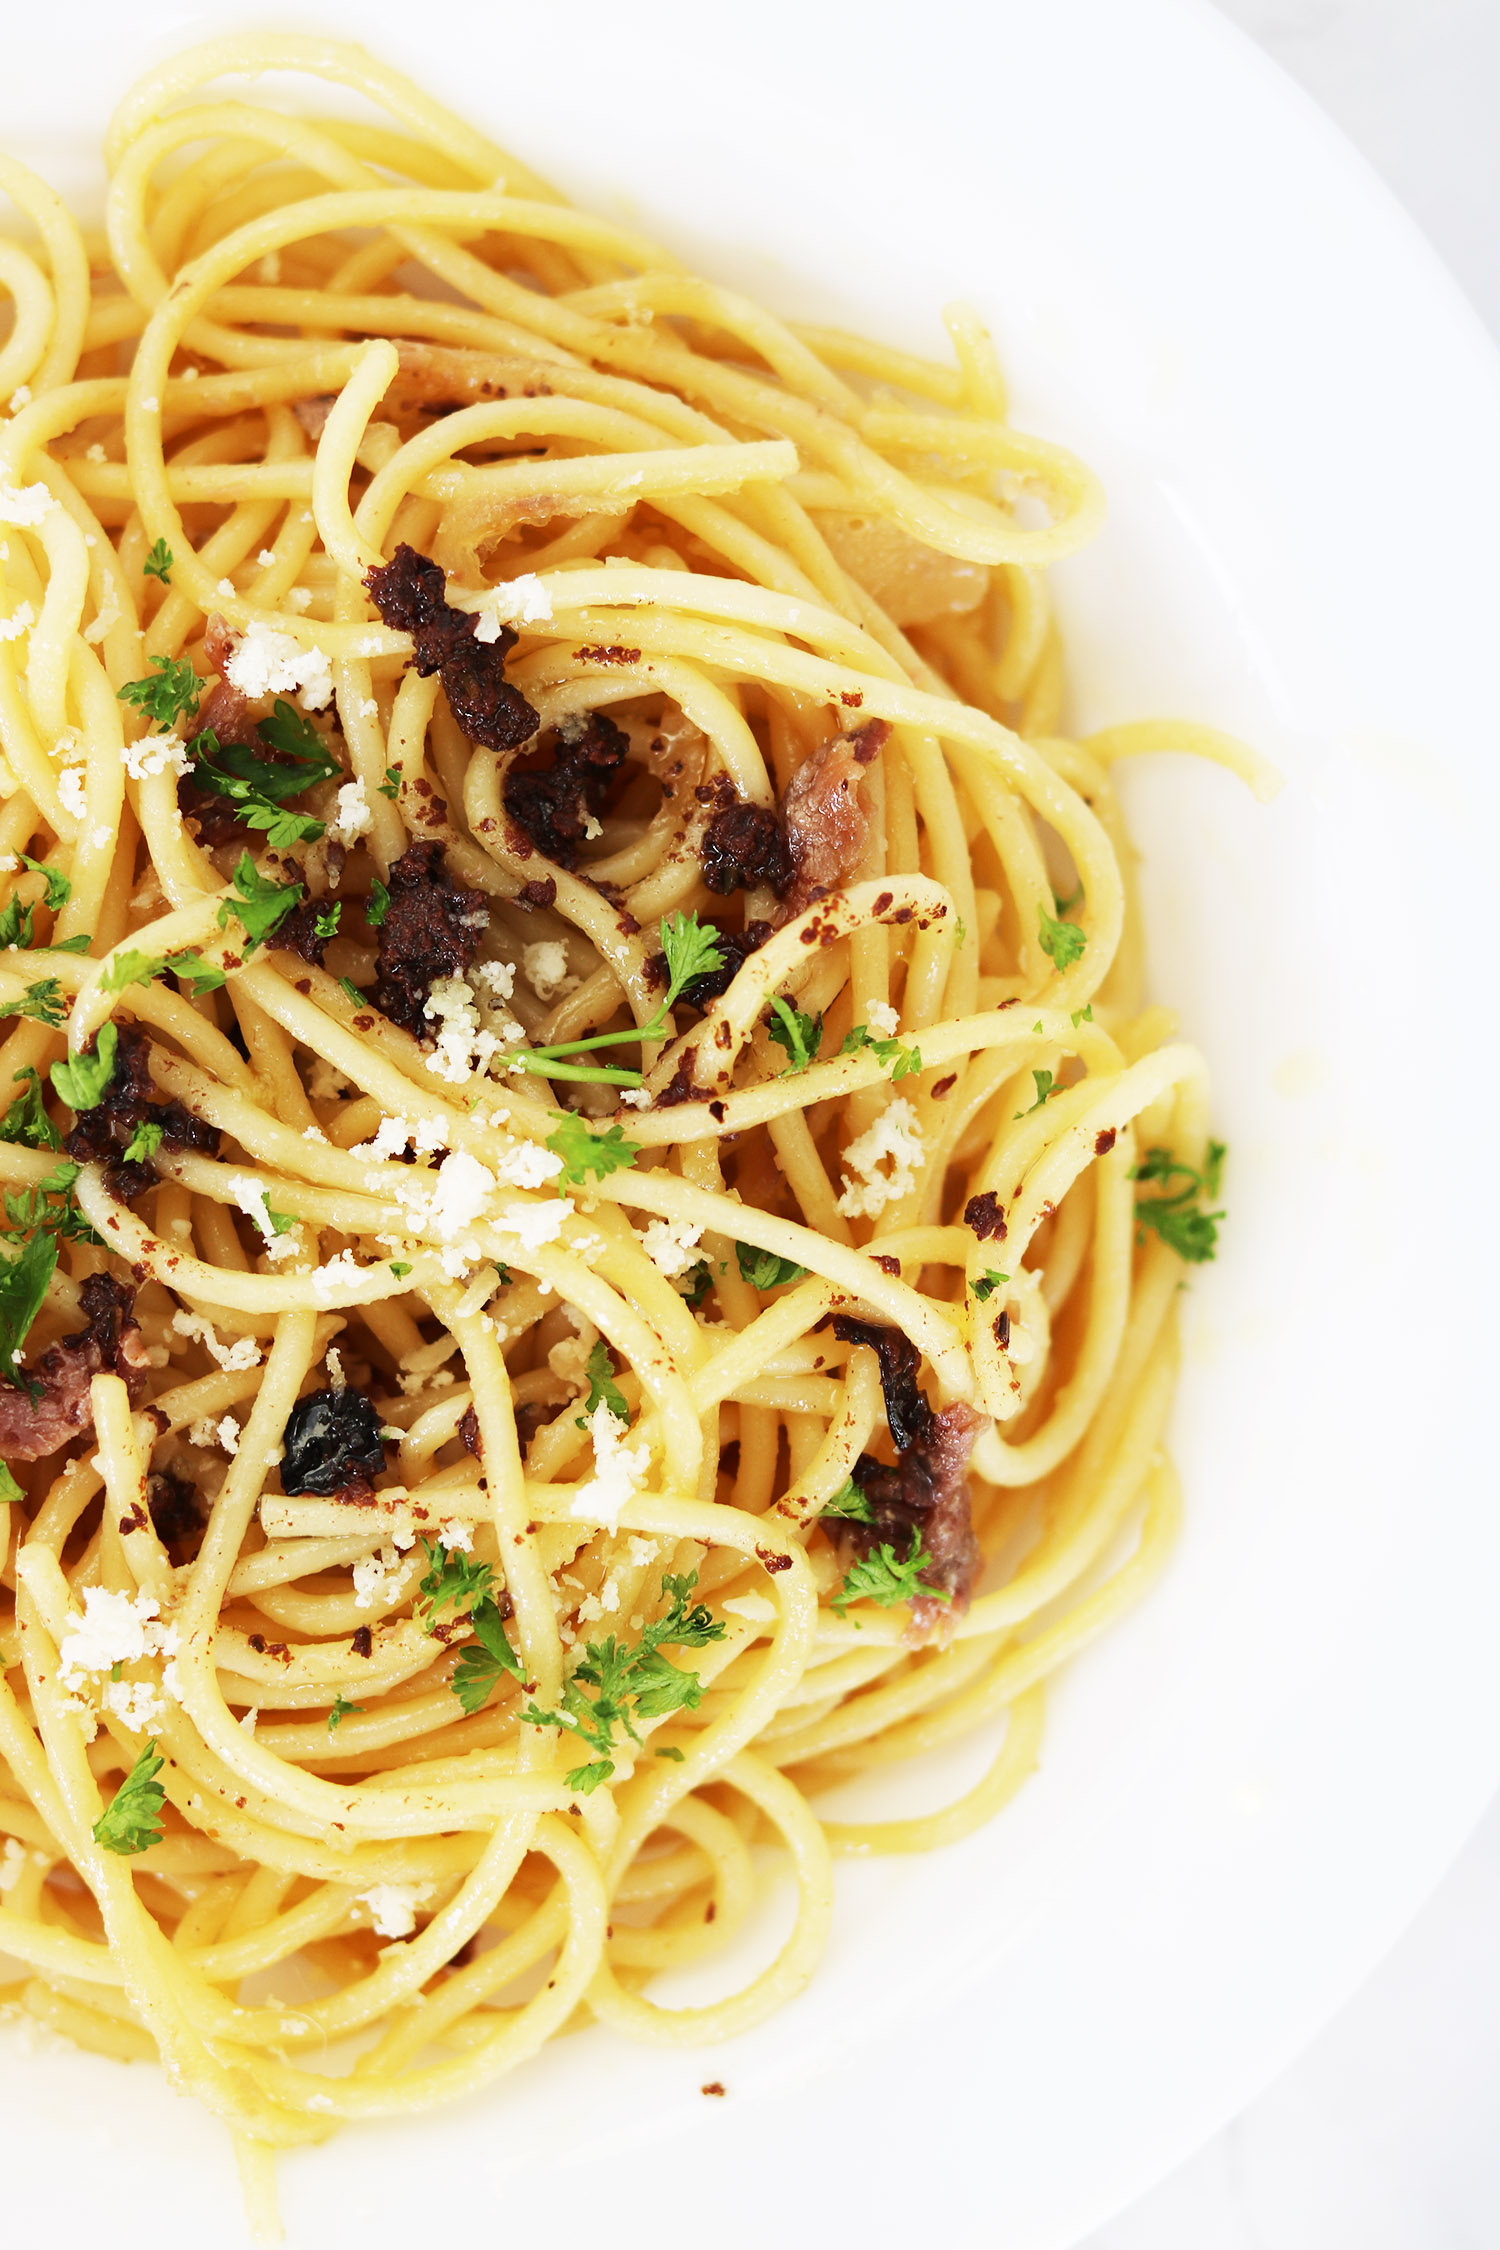
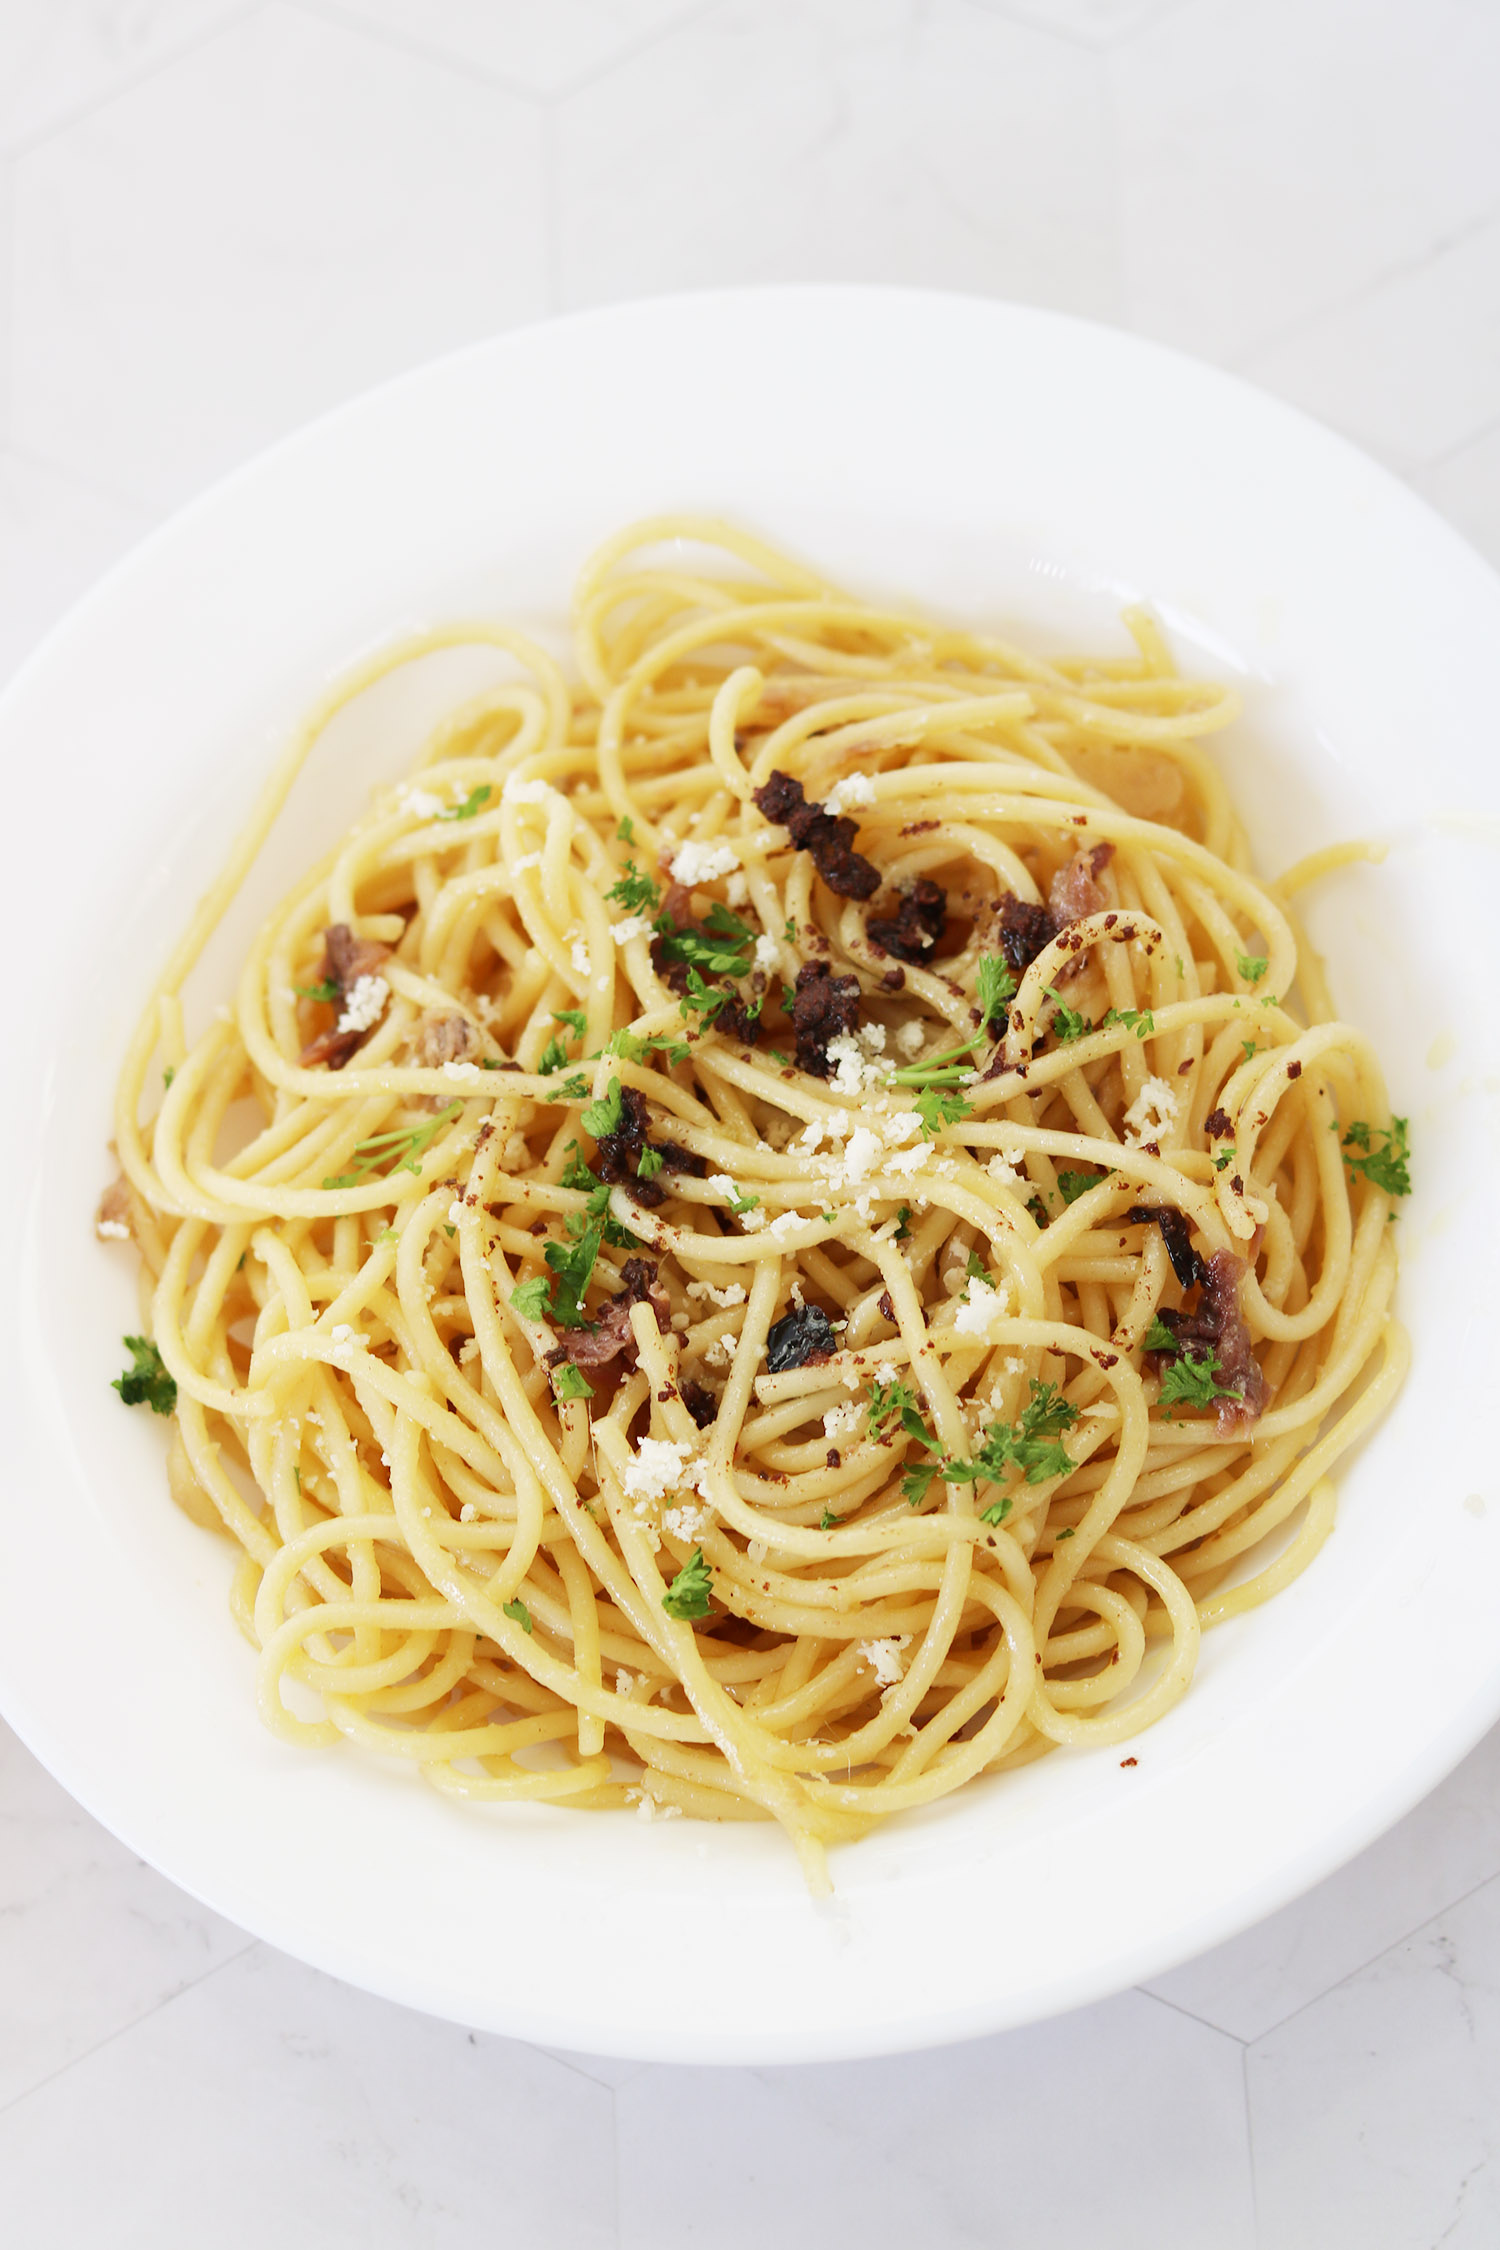
Recipe: Spaghetti with Olive Tapenade and Anchovy

Recipe: Pantry Pasta with Olive Tapenade and Anchovy

Whenever I’m in the mood for something quick and delicious, this pasta dish comes to mind. It’s incredibly simple, and once the pasta is done, the meal is ready in just a few minutes.

This recipe has become one of my staples over time, and I’m sure it could be one of yours too, because if you’re like me and always have anchovies, pasta, olive tapenade, garlic, and cheese in your pantry, you’re only 10 minutes away from a tasty dinner.

Notes

I use the olive tapenade from Spread-mmms, because the intense flavor goes very well with pasta. Furthermore, it comes with a little kick, which I really like.

When it comes to anchovies, it’s all about personal preference—coarsely chopped or fully mashed. I’m a blig fan of anchovies and I don’t mind larger chunks. The best kind for this dish are the flat, salted ones, darker and often sold in small jars or tins. The gourmet Cantabrian anchovies from Siesta are perfect for this dish.

Regarding pasta, I find that spaghetti works best for this recipe as it evenly distributes the cheese, but other pasta types can also be used.

Regarding cheese, most hard Italian varieties will do, but my top picks are Parmesan or Grana Padano.

You can also mix in a teaspoon of lemon juice with the pasta and other ingredients, and garnish with finely grated lemon zest. A sprinkle of chili flakes adds a nice touch of heat.

Recipe: Pantry Pasta with Olive Tapenade and Anchovy

Recipe by 2 Hungry Birds – Sanne Course: pasta, dinner
Servings

2

servings

Whenever I’m in the mood for something quick and delicious, this pasta dish comes to mind. It’s incredibly simple, and once the pasta is done, the meal is ready in just a few minutes.

Ingredients

  • Spaghetti

  • ¼ cup ¼ olive oil

  • 2 cloves 2 garlic

  • 6 6 anchovy fillets

  • ½ cup ½ parmesan cheese

  • 1 tea spoon 1 olive tapenade

  • 1 teaspoon 1 finely chopped parsley for garnish

Directions

  • In a large pot of boiling salted water, cook the spaghetti according to package instructions, but one minute less to avoid overcooking.
  • While the spaghetti is cooking, crush the garlic by placing the peeled garlic clove on a cutting board. Lay the flat side of a wide-bladed kitchen knife over the clove and press down firmly with the palm of your hand until the garlic is crushed.
  • Drain the spaghetti, but save a bit of pasta water in a cup.
  • Heat the olive oil in a large skillet over medium heat. Add the crushed garlic cloves and sauté until golden, but not browned, about 1-2 minutes.
  • Add the cooked spaghetti to the skillet with the anchovy oil mixture. Toss to coat the pasta evenly.
  • Add the olive tapenade, grated Parmesan cheese, and a few tablespoons of the pasta water to help create a silky sauce. Toss well to combine.
  • Add salt and pepper to taste. Be careful with the salt, as the anchovies and tapenade are already salty.
  • Divide the pasta between two plates. Garnish with finely chopped parsley and extra grated Parmesan cheese if desired. Serve immediately.

Recipe: Korean-style Spicy Tofu

Recipe: Korean-style Spicy Tofu

Tina: Having Korean friends and neighbors has great benefits. We get to invite ourselves over for amazing dinners, and have access to a tour guide to the world of Korean cooking. Korean cuisine is similar to Vietnamese food in that a lot of small dishes are combined for one meal, which I love. This dish is influenced by my old neighbor Sungmee, who provided the kimchi, chili powder, seaweed, and cooking tips. My favorite way of enjoying this dish is to wrap lettuce or toasted seaweed into rolls stuffed with tofu, rice, kimchi, and pickled daikon & carrots. Dip the rolls in Korean dipping sauce and enjoy the lovely flavors.

Notes

You can press the tofu to drain the water out by sandwiching the tofu between two plates, with one or two books placed on the top plate to add weight. You can do this the day before (or at least an hour before) making the dish.

Recipe: Korean-style Spicy Tofu

Recipe by 2 Hungry Birds – Tina Course: DinnerCuisine: Korea
Servings

4

servings

This dish is influenced by my old neighbor Sungmee, who provided the kimchi, chili powder, seaweed, and cooking tips. My favorite way of enjoying this dish is to wrap lettuce or toasted seaweed into rolls stuffed with tofu, rice, kimchi, and pickled daikon & carrots. Dip the rolls in Korean dipping sauce and enjoy the lovely flavors.

Ingredients

  • Tofu ingredients
  • 2 2 onions, halved and sliced

  • 2+1 tablespoons 2+1 sunflower oil

  • 1 teaspoon 1 toasted sesame oil

  • 1 pack 1 extra firm tofu, drained

  • 3 tablespoons 3 ssamjang (Korean soybean paste)

  • cup water

  • 1 tablespoon 1 soy sauce

  • 1 teaspoon 1 fishsauce

  • 2 teaspoons 2 gochugaru (Korean chili powder)

  • 1 teaspoon 1 sugar

  • 2 tablespoons 2 toasted sesame seeds

  • Cracked pepper

  • 1 ½ cup 1 ½ snap peas or snow peas

  • Dipping sauce ingredients
  • 3 tablespoons 3 soy sauce

  • 1 teaspoon 1 sesame oil

  • 1 ½ teaspoons 1 ½ rice vinegar

  • 1 teaspoon 1 toasted sesame seeds

  • A dash of gochugaru (Korean chili powder)

Directions

  • Heat sunflower oil (2 tablespoons) of on a pan over medium heat, and then sauté the onions for about 15-20 min. Set aside.
  • Mix the ssamjang, water, soy sauce, fish sauce, chili powder, sugar, sesame seeds and cracked pepper in a small bowl, and set aside. Cut the tofu into approx. 24 to 28 rectangular long pieces. (about 3/8”x 5” x 3.5”)
  • Heat the sunflower oil (1 tablespoon) and sesame oil on the pan, then add the tofu strips and fry them on both sides until crisp (in one or more batches). Add the sauce into the pan with the fried tofu, and stir while sautéing over medium heat for a few minutes until the tofu is coated with the sauce.
  • Toss the sautéed onions and peas in with the tofu. Continue to sauté until the peas are slightly cooked. The tofu is ready to be served.
  • Mix the dipping sauce ingredients and serve in a small dipping bowl.

Recipe: Polenta with Kale & Mushrooms

Recipe: Polenta with Kale & Mushrooms

Tina: Among my go-to staple foods these days are kale and mushrooms, and it’s hard to go wrong with those two.  We eat these at home in so many different ways because they are easy to make, very healthy, and most importantly just a delightful combination of flavors.

Today I chose to make polenta with my favorite sautéed vegetables. It is perfect recipe for those on a gluten-free diet, and if you don’t care for polenta, you can instead serve the sautéed vegetables with bulgur, quinoa, couscous or rice.

Recipe: Polenta with Kale & Mushrooms

Recipe by 2 Hungry Birds Course: Dinner, Polenta
Servings

6

servings

Among my go-to staple foods these days are kale and mushrooms, and it’s hard to go wrong with those two.  We eat these at home in so many different ways because they are easy to make, very healthy, and most importantly just a delightful combination of flavors.

Ingredients

  • Polenta
  • 4 cups 4 water

  • 1 teaspoon 1 salt

  • 1 cup 1 polenta

  • 1 tablespoon 1 butter

  • ½ cup ½ Parmesan cheese

  • Sautéed Kale and mushrooms
  • 1 tablespoon 1 olive oil

  • 1 1 shallot, chopped

  • 7 oz 7 (200g) mixed mushrooms, coarsely chopped

  • 1 tablespoon 1 soy sauce

  • ½ cup ½ chickpeas, cooked and drained

  • 3.5 oz 3.5 (100g) organic kale, roughly chopped

  • 2 tablespoons 2 sherry vinegar

  • 1 teaspoon 1 dried tarragon

  • 1 tablespoon 1 white wine

  • 1-2 tablespoons 1-2 butter

  • Garnish
  • Chopped chives

Directions

  • Polenta
  • Bring the water to a boil in a 2-3 quart pot (with a lid) on medium-high heat and add salt to the water.
  • Slowly and gradually add the polenta whisk the polenta in the boiling water in a steady motion.
  • Continue to whisk until the polenta thickens. Turn down the heat to low and keep whisking until the polenta is thick enough that it doesn’t settle back to the bottom of the pot when you stop stirring.
  • Put a lid on the pot and let it cook for another 30 min. while stirring in between.
  • Mix in the butter and cheese with the polenta and set aside, with the lid on, until you are ready to serve.
  • Sautéed Vegetables
  • Heat a sauté pan with olive oil on high heat, add the mushrooms, and cook for about 5 min.
  • Lower the heat to medium and add the chickpeas and soy sauce and cook for few minutes more until golden.
  • Add the sherry vinegar and kale and sauté until the kale has softened. Stir the tarragon into the vegetables.
  • Serve
  • Pour the polenta in a large dish (preferably covered with a lid to keep the polenta soft and warm) and pour the sautéed vegetables on top. Put the lid on to keep the dish warm.
  • To make a delicious pan sauce, place the previously used sauté pan over medium heat, and add a little white wine to the pan. Let the wine simmer and almost evaporate, and stir in 1-2 tablespoons of butter. Pour the sauce over the polenta and sautéed vegetables, and garnish with chives.
  • Serve immediately.

Recipe: Flæskesteg – Danish Pork Roast

Recipe: Flæskesteg - Danish Pork Roast

Flæskesteg is a classic Danish roast, usually served with boiled potatoes, caramelized potatoes, gravy and cooked red cabbage (or on a piece of rye bread with red cabbage, as I recommend in this post). Flæskesteg is still a popular dish, particularly for Sunday dinner among the older generation, and some people in Denmark eat flæskesteg for Christmas.

Flæskesteg is not easy to find in the U.S., mainly because you need to buy a piece of the pork neck or breast with the rind still attached. As a result, my flæskesteg recipe substitutes the traditional cuts with with a piece of pork belly, which is cheaper and easier to find.

My mum discovered that a great place to find pork belly for flæskesteg is at the “Mulberry Meat Market” on Mulberry St. between Canal St. and Bayard St., in New York’s Chinatown. Just walk to the back where the guys are slicing the meat and ask for a big piece of pork belly, and they will custom slice to the size you want.  I usually get a piece that is approximately 13” x 7”. The slab sometimes has bones, which you can tell them to keep or remove. My husband loves the bones so I always keep them in the cut.

Recipe: Flæskesteg – Danish Pork Roast

Recipe by 2 Hungry Birds – Tina Course: Dinner, roastCuisine: Denmark
Servings

16

servings

Flæskesteg is a classic Danish roast, usually served with boiled potatoes, caramelized potatoes, gravy and cooked red cabbage (or on a piece of rye bread with red cabbage, as I recommend in this post). Flæskesteg is still a popular dish, particularly for Sunday dinner among the older generation, and some people in Denmark eat flæskesteg for Christmas.

Ingredients

  • 4.5 lbs 4.5 pork belly (13″ x 7″ cut – ask you local butcher to cut it for you)

  • salt

  • bay leaves

  • Optional ingredients
  • 2 2 carrots, chopped roughly

  • 1 1 onion, chopped roughly

  • 2 2 sprigs of fresh thyme

Directions

  • Preheat the oven to 482 °F (250°C).
  • With a sharp knife, slice grooves into the rind of the pork belly with a knife, at about ¼ inch spacing. Slice the rind only – if you slice through the meat, juices will run out and make the rind soft instead of crispy.
  • Place the pork in a roasting pan with the rind facing downwards. Boil water and pour it into the pan just enough to cover the rind.
  • Insert the meat on the lower shelf for about 15 min. in the oven.
  •  If you want to make gravy with the meat juices, you can add chopped carrots, onion, and fresh thyme to the water in the roasting pan. If you just want to eat the meat, you can skip this step.
  • After 15 min in the oven, remove the meat and place a grill on the roasting pan. Place the meat on the grill with the rind side upward. Rub plenty of coarse salt on the pork belly rind, including the spaces in the sliced grooves. The salt will make the rind crispy. Stick a few bay leaves in between the grooves in the rind, and reduce the oven heat to 320°F (160°C). Be sure to level the meat as much as possible before putting back in the oven. You can use foil under the flæskesteg to make it level. This will help ensure the flæskesteg is evenly roasted.
  • Roast the flæskesteg for about 50 min in the oven, or until the internal temperature reaches 130 °F (160°C). Be sure to add more water to the roast pan if the liquid disappears.
  • Set the oven temperature to 482 °F (250°C). Choose an oven setting with a heat source above the meat (instead of below), such as Roast, Grill, or Broil.
  • Put the meat in the middle shelf of the oven and roast until the internal temperature reaches 158-167 °F (70-75°C). Keep and eye on the flæskesteg to make sure that the rind is not burning. It can be a little challenging to make the rind crispy.
  • Remove the flæskesteg from the oven and let it rest for about 10 min. Do not cover the meat since the rind will turn soft.
  • Cut the meat until right before you are about to serve the food. The meat will turn grey if you cut it too early. Cut into the meat through the grooves that were previously made in the rind.
  • If you are making gravy, decant the fat out of the liquid and strain the rest into a pot. While heating the gravy in the pot, mix ¼ cup of water with about two tablespoons of cornstarch, stir well, and then pour into the pot with the gravy. The gravy should slowly thicken. If you want the gravy thicker, repeat with water and cornstarch. Add salt and pepper to taste.

Recipe: Sudado de Pollo – Colombian Chicken Stew

Recipe: Sudado de Pollo (Colombian-Style Chicken Stew

Sudado de Pollo is a delicious Colombian stew made with chicken, potatoes, and tomatoes. It was Izabela (@lucaholguin_), who first introduced me to this tasty dish from her home country, and it soon became a favorite among my husband and my kids. Sudado de Pollo is really easy to make, and you only need a handful of ingredients, which you probably already have in your fridge. I usually serve Sudado de Pollo with garlic rice, but you can also serve it with plain white rice.

Recipe: Sudado de Pollo (Colombian-Style Chicken Stew

Recipe by Izabela @lucaholguin_ Course: DinnerCuisine: Colombia
Servings

4

servings

Sudado de Pollo is really easy to make, and you only need a handful of ingredients, which you probably already have in your fridge. I usually serve Sudado de Pollo with garlic rice, but you can also serve it with plain white rice.

Ingredients

  • ½ ½ onion

  • 3-4 3-4 tomatoes

  • 4 cloves 4 garlic

  • ½ cup ½ cilantro (to put in the blender with the other ingredients)

  • ½ cup ½ cilantro (for decoration)

  • 2-3 2-3 big potatoes

  • 8 pieces 8 of chicken (legs or thighs)

Directions

  • In a blender, combine the tomatoes, onion, garlic, and cilantro. Blend until smooth, creating a vibrant sauce that forms the heart of your Sudado.
  • Cut the potatoes into medium size dices.
  • In a large pot or Dutch oven, heat a bit of oil over medium heat. Add the chicken pieces and sear them for 4-5 minutes on each side, until they develop a golden-brown hue.
  • Put the diced potatoes into the pot with the browned chicken. Pour over the sauce and cover with a lid. Let simmer for 30-40 minutes.
  • Garnish with the rest of the cilantro and serve with rice.

Recipe Video

Recipe: Spicy Tofu Tacos

Recipe: Spicy Tofu Tacos

Back in the days, tofu was always a weird food to me. My image of tofu was a product with a bland taste, which could be transformed to have the consistency of meat. What was the purpose of trying to make something taste like meat if you were trying to avoid meat? Over the years, however, I have learned to appreciate tofu as one of the great healthy foods, and have learned the right ways to prepare tofu with amazing flavors.

My inspiration for trying tofu in my cooking was my friend Silas, who always bragged about how good his tofu tacos were. I was curious – how good could tofu be? By the time I was finally invited over to try his tofu tacos, which were amazing, I had already developed my own little recipe. His version of tofu tacos is actually not too far from my own, but mine are perhaps a bit spicier. Silas also introduced me to a taco topping that I now can’t live without, kalamata olives. That amazing salty taste perfectly complements the other flavors in the right way – give it a try even if you think it sounds a bit strange.

Today it is rare that we eat meat tacos at home, both because we try to keep a healthier lifestyle and because the tofu tacos are really good.

Here is the recipe for homemade taco seasoning

Recipe: Spicy Tofu Tacos

Recipe by 2 Hungry Birds – Tina Course: Dinner
Servings

4

servings

My inspiration for trying tofu in my cooking was my friend Silas, who always bragged about how good his tofu tacos were. I was curious – how good could tofu be? By the time I was finally invited over to try his tofu tacos, which were amazing, I had already developed my own little recipe. His version of tofu tacos is actually not too far from my own, but mine are perhaps a bit spicier.

Ingredients

  • 1 package 1 extra firm tofu

  • 2 tablespoons 2 olive oil

  • 1 1 small onion, cut into small cubes

  • 2 2 garlic cloves

  •  Juice from ½ lime

  • 4 tablespoons 4 tomato paste

  • tablespoons homemade taco seasoning

  • Garnish
  • 1 tablespoon 1 chopped cilantro

Directions

  • Press the liquid from the tofu for about 20 min.  To press the tofu, you can place it on a plate, with another plate on top, and then add some weight on top (for example, a couple of heavy books).
  • Heat olive oil in a pan, and sauté the onions and garlic until translucent and slightly browned.
  • Crumble the tofu with your hands and add it to the pan with the onions and garlic.
  • Mix in the taco seasoning (you can add more or less of the taco seasoning depending on how flavorful and spicy you like it) and stir until well mixed. Add the squeezed lime juice and tomato paste, and stir until combined. If the tofu is too dry, you can add a tablespoon or two of water to dilute the tomato paste and create a sauce.
  • Transfer the tofu to a serving bowl, and garnish with cilantro.
  • Serve the tofu with you favorite toppings such as sliced cherry tomatoes, lettuce, chopped kalamata olives, lime wedges, fresh corn, sour cream, salsa, shredded mozzarella cheese, avocado (guacamole) and black beans.

Recipe: Creamy Black Beans

Recipe: Creamy Black Beans

Black beans have become one of our favorite dishes at home after finally finding the right combination of spices and the perfect cooking time. I have tried many different recipes back in the days but nothing that gave me a good creamy sauce. The secret to making the creamy black beans is actually adding tomato paste it just gives the right texture. It’s easy to make the dish but the downside is the cooking time. It takes about 2 hours to cook in a pot, but if you have a crockpot then you can just throw it in the crockpot in the morning and come home to a warm and delicious meal.

I prefer to serve it over rice (for a healthier version I cook ⅔ of brown rice with ⅓ of wild rice) and a bit of shredded cheese and then topping the beans with a dollop of sour cream and a sprinkle of cilantro. You can eat it just like that or spoon the rice and beans up with organic blue corn tortilla chips.

For this dish you need to make the homemade taco seasoning mix that I have posted previously. It’s a lot of spices to buy if you don’t have them already but it will be worth the money as you can add this taco seasoning to any meat, tofu and vegetables you like. Just remember to add some tomato paste and water for the meat and tofu dishes.

Recipe: Creamy Black Bean

Recipe by 2 Hungry Birds – Tina Course: Dinner, Lunch
Servings

4

servings

The secret to making the creamy black beans is actually adding tomato paste it just gives the right texture. It’s easy to make the dish but the downside is the cooking time. It takes about 2 hours to cook in a pot, but if you have a crockpot then you can just throw it in the crockpot in the morning and come home to a warm and delicious meal.

Ingredients

  • 1 tablespoon 1 sunflower oil

  • 1 1 small onion, chopped.

  • 2 2 garlic cloves, minced

  • 1 cup 1 black beans

  • 3 cups 3 water

  • 1 ½ tablespoons 1 ½ chicken bouillon or vegetable if you prefer vegetarian (I use “Better than bouillon”)

  • 3 teaspoons 3 homemade taco seasoning (see recipe here)

  • 3 oz 3 tomato paste

Directions

  • Soak the beans in cold water for 8 hours or over night.
  • Drain the beans and discard the water. Rinse thoroughly with cool water.
  • Sauté onions and garlic in a medium pot until translucent and then add the taco seasoning and sauté for another minute.
  • Add the beans in the pot with water and chicken bouillon and simmer on low for about 1 hour with a lid on and another 45 min to1 hour without a lid on. Remember to stir occasionally to prevent the beans from burning to the bottom. 4. Serve over steamed rice, shredded cheese and top the beans with sour cream, sliced avocado and a sprinkle of cilantro. Scoop the delicious rice and beans with corn tortilla chips.
  • Serve with rice, shredded cheese, sour cream, cilantro and sliced avocado.
Recipe: Creamy Black Bean

Recipe: Spicy Sweet Potato and Black Bean Enchiladas

Recipe: Spicy Sweet Potato and Black Bean Enchiladas

I usually always cook for my friends when they stop by, but when my good friend TB wanted to stop by, I asked her to help me as my energy wasn’t quite as high since I was big and pregnant at the time. TB has over the time realized that her body does best with a vegetarian and gluten-free diet so that gave me a challenge to come up with a good dish that was also pregnant friendly.

Recipe: Spicy Sweet Potato and Black Bean Enchiladas

Recipe by 2 Hungry Birds – Tina Course: Dinner
Servings

16

Enchiladas

I usually always cook for my friends when they stop by, but when my good friend TB wanted to stop by, I asked her to help me as my energy wasn’t quite as high since I was big and pregnant at the time. TB has over the time realized that her body does best with a vegetarian and gluten-free diet so that gave me a challenge to come up with a good dish that was also pregnant friendly.

Ingredients

  • Enchilada sauce ingredients
  • 1 can 1 (15 oz) organic tomato sauce

  • 3.5 oz 3.5 chipotle peppers in adobo sauce, depending on your spice level (From the 7 oz. can I add 1-2 whole chipotle peppers and the rest of the adobo sauce and that is a pretty spicy sauce)

  • ¾ cup ¾ nonfat plain yogurt

  • 2 cloves 2 garlic, crushed with a garlic press

  • Enchilada ingredients
  • 1 tablespoon 1 olive oil

  • 1 1 small/medium yellow onion, diced

  • 1 lb 1 of sweet potato, cubed about ¾ inch

  • ¼ cup ¼ water

  • 1 can 1 (15 oz.) organic black beans, rinsed and drained

  • 1 cup 1 organic frozen sweet corn

  • Salt and pepper, to taste

  • 2 cups 2 shredded mozzarella cheese

  • 14-16 14-16 corn tortillas

  • Topping/sides
  • Cilantro and/or green onions

  • Sour cream

  • Avocado

  • Tortilla chips

Directions

  •  Preheat oven to 350ºF.
  • To make the sauce use a blender and add tomato sauce, chipotle peppers with adobo sauce, yogurt, and garlic and blend until smooth and combined. Let the enchilada sauce cool in the fridge to thicken up.
  • Meanwhile heat a large skillet with olive oil over medium heat. Add the onions and sauté until soften (about 2 min). Add the sweet potato and water to the skillet, stir, and cover. Let the vegetables cook for about 12-15 minutes or until fork tender, stir occasionally to ensure that the sweet potatoes doesn’t burn. You can add more water if needed. Once the sweet potato is fork tender, transfer to large bowl and add in black beans, corn, and 1 cup of the enchilada sauce, salt and pepper and stir to combine.
  • Spray an ovenproof dish with a little oil and add about 3/4 cup of the enchilada sauce on top, spread the sauce to cover the whole bottom.
  • Warm corn tortillas in the microwave for about 30 seconds so that they are easier to roll up, it will prevent the tortillas from cracking and breaking and make them easier to roll up. Add about 1/3 cup of the sweet potato and black bean mix and a little of shredded cheese to each tortilla. Roll each tortilla up and place them seam side down in your dish. Brush remaining enchilada sauce over the top of all the rolled up tortillas, and sprinkle shredded cheese on top.
  • Bake for 25-35 minutes or until cheese is melted and the edges of tortillas begin to turn a nice golden brown.
  • Serve with sour cream, tortilla chips, avocado slices, cilantro, and green onions, if desired.

Recipe: Vietnamese THỊT NƯỚNG (CARAMELIZED GRILLED PORK)

Recipe: Vietnamese THỊT NƯỚNG (CARAMELIZED GRILLED PORK)

The traditional way of making thit nuong is to cut the meat into 2-3 inch strips, then marinade the meat and grill it in between two wire baskets over a charcoal grill. The marinade consists of caramelized sugar syrup (nuoc mau) and fish sauce, two cooking essentials in the Vietnamese kitchen.

The fish sauce is very salty (and a bit smelly), but it has a lot of flavor. I often add a few dashes to my chicken, pork, and shrimp instead of salt and a little bit of sugar to get the protein crispy.

There are a bunch of traditional Vietnamese dishes where thit nuong is included, but here are a few of my favorites:
• Rice with grilled meat (‘com thit nuong’ as seen on the top picture)
The Vietnamese sandwich (banh mi thit nuong)
• Angel hair rice noodles with grilled pork, served with lettuce for wrapping (banh hoi thit heo nuong)

As a city-dweller I am not privileged to have a garden with an outdoor grill, so unfortunately I have to make this in my oven. For this I use pork chops, which are on the more fatty side. If you do have a charcoal grill, you can make it the traditional way and use pork butt or shoulder instead.

Recipe: Vietnamese THỊT NƯỚNG (CARAMELIZED GRILLED PORK)

Recipe by 2 Hungry Birds – Tina Course: DinnerCuisine: Vietnam
Servings

4

servings

The traditional way of making thit nuong is to cut the meat into 2-3 inch strips, then marinade the meat and grill it in between two wire baskets over a charcoal grill. The marinade consists of caramelized sugar syrup (nuoc mau) and fish sauce, two cooking essentials in the Vietnamese kitchen.

Ingredients

  • 2 lbs 2 900 grams) pork chops (or 1 ½ lbs. (680 grams) pork butt or shoulder, thinly sliced to about ¼ inch thick)

  • ¼ cup ¼ (60 ml) lemongrass, minced

  • ¼ cup ¼ (60 ml) sugar

  • 1 tablespoon 1 ground pepper

  • 2 tablespoons 2 fish sauce

  • 3 tablespoons 3 sesame oil

  • 3 3 garlic cloves, crushed and minced

  • 3 3 small shallots, minced

  • 1 tablespoon 1 nuoc mau (Vietnamese caramel syrup)

Directions

  • Prepare the marinade with the above ingredients and coat the meat to marinade for at least 1-2 hours or for more enhanced taste the day before.
  • For oven: Set the oven to broil or grill and place the meat on a grilling rack right under the heating element. Broil/grill a few minutes on each side.
    For charcoal grill: lay out the meat in between two wire baskets and grill for a few minutes on each side.
Recipe: Vietnamese THỊT NƯỚNG (CARAMELIZED GRILLED PORK)

Recipe: Coconut Chicken Curry

Recipe: Coconut Chicken Curry

With colder weather around the corner, hot meals are on my mind. I recently whipped up this hot spicy coconut chicken curry dish when my neighbor stopped by with her son to get out of the blowing wind and cold rain. It is perfect for a cozy night indoors.

Recipe: Coconut Chicken Curry

Recipe by 2 Hungry Birds – Tina Course: Dinner
Servings

4

servings

With colder weather around the corner, hot meals are on my mind. I recently whipped up this hot spicy coconut chicken curry dish when my neighbor stopped by with her son to get out of the blowing wind and cold rain. It is perfect for a cozy night indoors.

Ingredients

  • 2 tablespoons 2 olive oil

  • 12 oz 12 antibiotics-free and organic free-range chicken breast

  • 1 1 medium carrot, diced

  • 1 1 medium onion, sliced

  • teaspoons fresh ginger, minced

  • 2-3 cloves 2-3 garlic, minced

  • 1 teaspoon 1 curry powder

  • 1 teaspoon 1 ground cumin

  • 1 teaspoon 1 chili powder

  • 1 can 1 (14oz) coconut milk

  • 1 tablespoon 1 curry paste (red or green)

  • 1 teaspoon 1 salt

  • 1 can 1 garbanzo beans, rinsed and drained

  • 1 bunch 1 Swiss chard, cleaned, stems removed, and roughly chopped

Directions

  • In a large pot, heat olive oil on medium high heat and add the chicken. Cook until the chicken has seared on the outside.
  • Add the carrots, and sauté for another 1-2 minutes.
  • Add the onion and ginger, sauté for another 2 minutes, and then add the garlic, curry, cumin and chili powder. Stir and let the spices toast for a minute, and then add the coconut milk. Fill the coconut milk can with water and add it in the pot. Let the mixture simmer for about 20 min.
  • Add the chickpeas and Swiss chard to the pot and cook for another 10-15 minutes.
  • Serve the chicken curry steaming hot with a bowl of rice.
Recipe: Coconut Chicken Curry