Recipe: Spicy Shakshuka

Recipe: Spicy Shakshuka


Shakshuka is a versatile and delightful dish that’s traditionally enjoyed for breakfast, but it also shines as a hearty lunch or even dinner option. At its core, Shakshuka features eggs poached in a rich tomato sauce, often spiced and simmered to perfection.

I’ve tasted various renditions of Shakshuka, some enriched with bell peppers, onions, and other vegetables. Personally, I prefer a straightforward, yet spicy, tomato base, but occasionally, I would add some chorizo for an added layer of flavor.

What’s truly wonderful about this dish is its simplicity. Not only are the ingredients commonly available, but the preparation is also straightforward. You can cook it in a large skillet to serve a crowd or, as is my preference, create individual servings using ramekins. This ensures each person gets their perfectly poached egg nestled in a bed of luscious tomato sauce.

Recipe: Spicy Shakshuka

Recipe by 2 Hungry Birds – Tina Course: Breakfast, Brunch
Servings

6

servings

I’ve tasted various renditions of Shakshuka, some enriched with bell peppers, onions, and other vegetables. Personally, I prefer a straightforward, yet spicy, tomato base, but occasionally, I would add some chorizo for an added layer of flavor.

Ingredients

  • 3 tablespoons 3 olive oil

  • 3 3 jalapeños, stemmed, seeded, and finely chopped

  • 1 1 shallot, chopped

  • 4 4 cloves garlic, crushed and minced

  • 1 teaspoon 1 ground cumin

  • 1 tablespoon 1 paprika

  • 1 pinch 1 cayenne pepper

  • 1 can 1 (28 oz.) whole peeled tomatoes with juices

  • Salt and pepper

  • 12 12 eggs

  • ½ cup ½ feta cheese, crumbled

  • 1 tablespoon 1 parsley, chopped

  • Toasted sliced bread/baguette or pita bread

Directions

  • Heat oil in a medium-sized pot over medium-high heat. Add jalapeno and shallot and cook, stirring occasionally, until soft and golden brown, about 6 minutes. Add garlic, cumin, paprika and cayenne, and cook, stirring frequently, until the garlic is soft, about 2 more minutes.
  • Crush the tomatoes with your hands and add the tomatoes and their liquid into the pot with onions and jalapeño. Add 1/2 cup water, reduce heat to medium, and simmer, stirring occasionally, until the sauce thickens (about 20 minutes). Season sauce with salt and pepper.
  • Preheat oven to 375ºF
  • In 6 small ramekins, distribute the spicy tomato sauce and crack two eggs on top in each of the ramekins. Spoon a little of the sauce over the sides of the eggs, being careful not to destroy the yolks, and bake them in the oven for about 10 minutes depending on your egg preference.
  • Sprinkle the shakshuka with feta and parsley and serve with fresh baked toasted bread. The bread will be used to spoon your sauce and eggs up.
Recipe: Spicy Shakshuka

Recipe: Creamy Black Beans

Recipe: Creamy Black Beans

Black beans have become one of our favorite dishes at home after finally finding the right combination of spices and the perfect cooking time. I have tried many different recipes back in the days but nothing that gave me a good creamy sauce. The secret to making the creamy black beans is actually adding tomato paste it just gives the right texture. It’s easy to make the dish but the downside is the cooking time. It takes about 2 hours to cook in a pot, but if you have a crockpot then you can just throw it in the crockpot in the morning and come home to a warm and delicious meal.

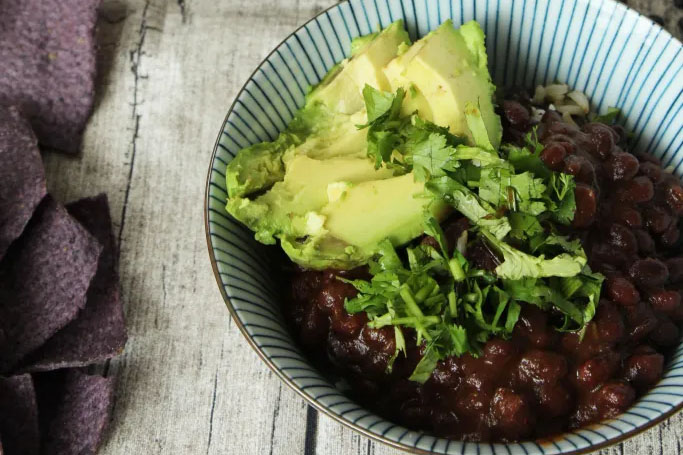
I prefer to serve it over rice (for a healthier version I cook ⅔ of brown rice with ⅓ of wild rice) and a bit of shredded cheese and then topping the beans with a dollop of sour cream and a sprinkle of cilantro. You can eat it just like that or spoon the rice and beans up with organic blue corn tortilla chips.

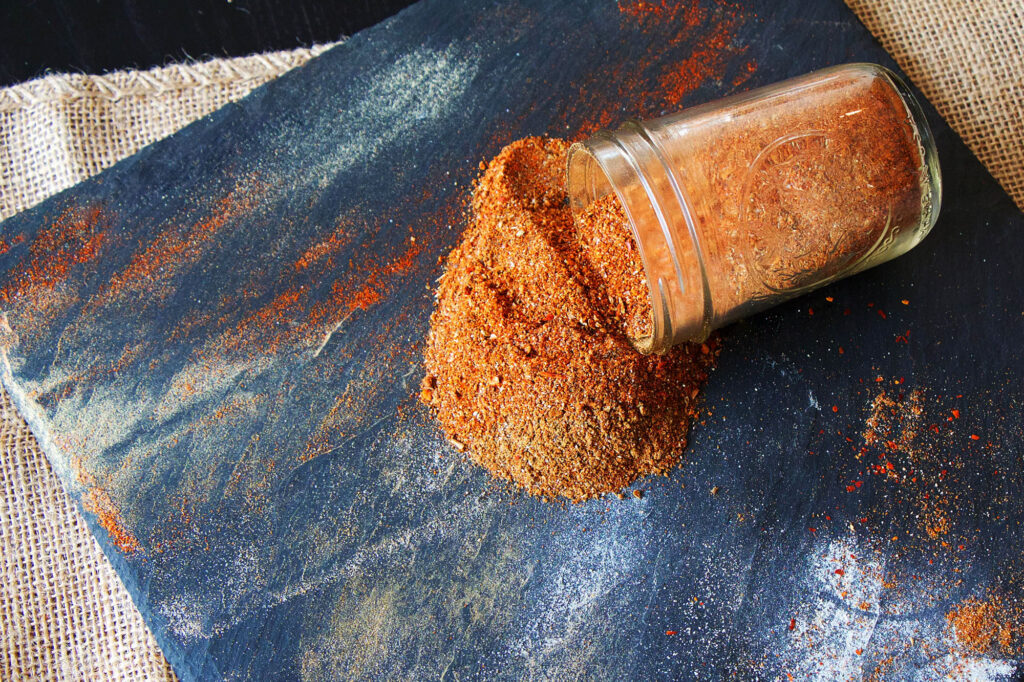
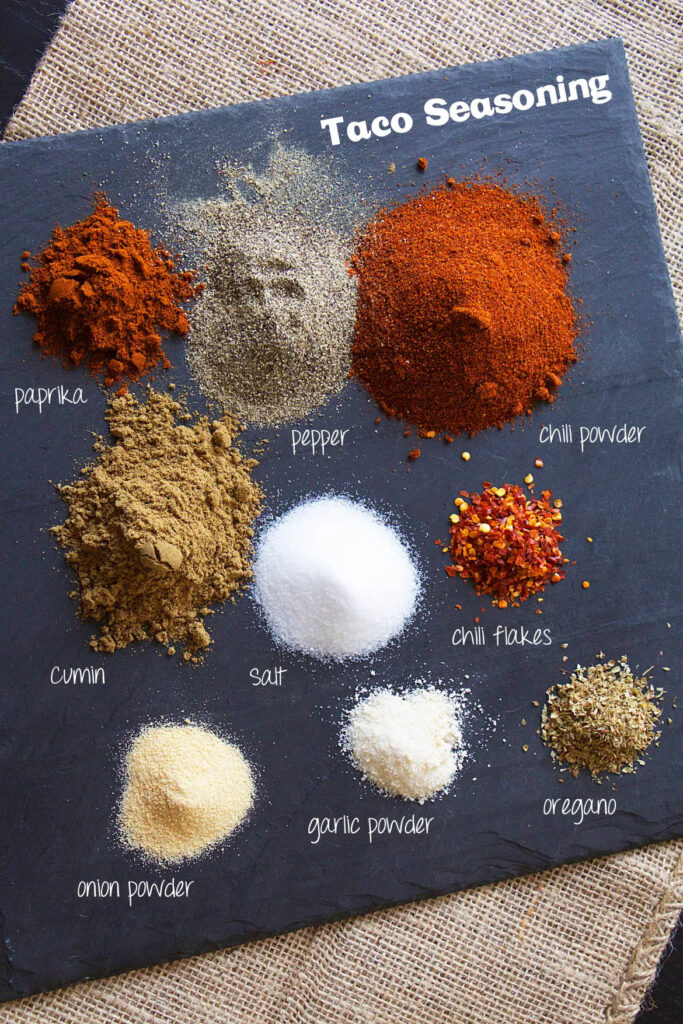
For this dish you need to make the homemade taco seasoning mix that I have posted previously. It’s a lot of spices to buy if you don’t have them already but it will be worth the money as you can add this taco seasoning to any meat, tofu and vegetables you like. Just remember to add some tomato paste and water for the meat and tofu dishes.

Recipe: Creamy Black Bean

Recipe by 2 Hungry Birds – Tina Course: Dinner, Lunch
Servings

4

servings

The secret to making the creamy black beans is actually adding tomato paste it just gives the right texture. It’s easy to make the dish but the downside is the cooking time. It takes about 2 hours to cook in a pot, but if you have a crockpot then you can just throw it in the crockpot in the morning and come home to a warm and delicious meal.

Ingredients

  • 1 tablespoon 1 sunflower oil

  • 1 1 small onion, chopped.

  • 2 2 garlic cloves, minced

  • 1 cup 1 black beans

  • 3 cups 3 water

  • 1 ½ tablespoons 1 ½ chicken bouillon or vegetable if you prefer vegetarian (I use “Better than bouillon”)

  • 3 teaspoons 3 homemade taco seasoning (see recipe here)

  • 3 oz 3 tomato paste

Directions

  • Soak the beans in cold water for 8 hours or over night.
  • Drain the beans and discard the water. Rinse thoroughly with cool water.
  • Sauté onions and garlic in a medium pot until translucent and then add the taco seasoning and sauté for another minute.
  • Add the beans in the pot with water and chicken bouillon and simmer on low for about 1 hour with a lid on and another 45 min to1 hour without a lid on. Remember to stir occasionally to prevent the beans from burning to the bottom. 4. Serve over steamed rice, shredded cheese and top the beans with sour cream, sliced avocado and a sprinkle of cilantro. Scoop the delicious rice and beans with corn tortilla chips.
  • Serve with rice, shredded cheese, sour cream, cilantro and sliced avocado.
Recipe: Creamy Black Bean

Recipe: Spicy Sweet Potato and Black Bean Enchiladas

Recipe: Spicy Sweet Potato and Black Bean Enchiladas

I usually always cook for my friends when they stop by, but when my good friend TB wanted to stop by, I asked her to help me as my energy wasn’t quite as high since I was big and pregnant at the time. TB has over the time realized that her body does best with a vegetarian and gluten-free diet so that gave me a challenge to come up with a good dish that was also pregnant friendly.

Recipe: Spicy Sweet Potato and Black Bean Enchiladas

Recipe by 2 Hungry Birds – Tina Course: Dinner
Servings

16

Enchiladas

I usually always cook for my friends when they stop by, but when my good friend TB wanted to stop by, I asked her to help me as my energy wasn’t quite as high since I was big and pregnant at the time. TB has over the time realized that her body does best with a vegetarian and gluten-free diet so that gave me a challenge to come up with a good dish that was also pregnant friendly.

Ingredients

  • Enchilada sauce ingredients
  • 1 can 1 (15 oz) organic tomato sauce

  • 3.5 oz 3.5 chipotle peppers in adobo sauce, depending on your spice level (From the 7 oz. can I add 1-2 whole chipotle peppers and the rest of the adobo sauce and that is a pretty spicy sauce)

  • ¾ cup ¾ nonfat plain yogurt

  • 2 cloves 2 garlic, crushed with a garlic press

  • Enchilada ingredients
  • 1 tablespoon 1 olive oil

  • 1 1 small/medium yellow onion, diced

  • 1 lb 1 of sweet potato, cubed about ¾ inch

  • ¼ cup ¼ water

  • 1 can 1 (15 oz.) organic black beans, rinsed and drained

  • 1 cup 1 organic frozen sweet corn

  • Salt and pepper, to taste

  • 2 cups 2 shredded mozzarella cheese

  • 14-16 14-16 corn tortillas

  • Topping/sides
  • Cilantro and/or green onions

  • Sour cream

  • Avocado

  • Tortilla chips

Directions

  •  Preheat oven to 350ºF.
  • To make the sauce use a blender and add tomato sauce, chipotle peppers with adobo sauce, yogurt, and garlic and blend until smooth and combined. Let the enchilada sauce cool in the fridge to thicken up.
  • Meanwhile heat a large skillet with olive oil over medium heat. Add the onions and sauté until soften (about 2 min). Add the sweet potato and water to the skillet, stir, and cover. Let the vegetables cook for about 12-15 minutes or until fork tender, stir occasionally to ensure that the sweet potatoes doesn’t burn. You can add more water if needed. Once the sweet potato is fork tender, transfer to large bowl and add in black beans, corn, and 1 cup of the enchilada sauce, salt and pepper and stir to combine.
  • Spray an ovenproof dish with a little oil and add about 3/4 cup of the enchilada sauce on top, spread the sauce to cover the whole bottom.
  • Warm corn tortillas in the microwave for about 30 seconds so that they are easier to roll up, it will prevent the tortillas from cracking and breaking and make them easier to roll up. Add about 1/3 cup of the sweet potato and black bean mix and a little of shredded cheese to each tortilla. Roll each tortilla up and place them seam side down in your dish. Brush remaining enchilada sauce over the top of all the rolled up tortillas, and sprinkle shredded cheese on top.
  • Bake for 25-35 minutes or until cheese is melted and the edges of tortillas begin to turn a nice golden brown.
  • Serve with sour cream, tortilla chips, avocado slices, cilantro, and green onions, if desired.

Recipe: Quinoa and Salmon Fritters

Recipe: Quinoa and Salmon Fritters

During a recent stay at a vacation house with a group of friends, we put our culinary skills together and hosted an over-the-top potluck style feast. I came home with some great leftover salmon and new inspiration from my friends’ cooking.

I really hate to waste food, so I try and incorporate my leftovers into new dishes whenever I can. I made this recipe with the salmon and a few other things I found in my fridge. The dish turned out great so I had to share it with you. 

Recipe: Quinoa and Salmon Fritters

Recipe by 2 Hungry Birds – Tina Course: Lunch
Servings

4

servings

During a recent stay at a vacation house with a group of friends, we put our culinary skills together and hosted an over-the-top potluck style feast. I came home with some great leftover salmon and new inspiration from my friends’ cooking. I really hate to waste food, so I try and incorporate my leftovers into new dishes whenever I can. I made this recipe with the salmon and a few other things I found in my fridge. The dish turned out great so I had to share it with you.

Ingredients

  • ½ cup ½ quinoa

  • 3 tablespoons 3 parsley, finely chopped

  • 7 oz 7 (200g) cooked salmon (leftover), torn into smaller pieces

  • ½ cup ½ bread crumbs

  • ½ cup ½ Parmesan cheese

  • ½ teaspoon ½ salt

  • Fresh cracked pepper

  • ½ teaspoon ½ cumin

  • ½ teaspoon ½ curry powder

  • 2 tablespoons 2 olive oil, for frying

Directions

  • Cook the quinoa as directed on package and let it cool.
  • In a large bowl, mix all the above ingredients except for olive oil.
  • Shape them into small patties and make sure to squeeze them tightly to prevent them from falling apart during cooking.
  • Heat olive oil in a pan on medium high heat and add the patties. Sauté until browned on each side.
  • Serve with simple arugula salad and a few slices of avocado.

Recipe: Homemade Arepas

Recipe: Homemade Arepas

I have heard a lot about arepas from my Venezuelan friend Indira – she has promised for years to make them for me. She finally made them recently and they have fascinated me ever since.

Arepas originated in Venezuela, and are used prominently in modern day cuisine of Venezuela, Colombia, and in other Latin American countries. They look somewhat like pita bread, but are typically made of precooked corn flour and fried on a skillet instead of baked in the oven. They are served very hot and you can fill them with a little butter and grated cheese, which is the simple and traditional way of serving them. Arepas are also great if you  are on a gluten free/heart healthy diet. If you are on a low sodium diet then don’t add the salt to the dough and of course adjust your stuffing to your diet.

Arepas should be easy to make, as they consist only of 4 simple ingredients. However, the truth is that to make truly great arepas, you need to know a few tricks that you probably won’t pick up from a YouTube video. I was able to finally learn how to make them when Indira’s mother recently visited from Venezuela and I invited myself over. 

Arepas are actually incredibly easy to make, once you understand how to deal with the dough. Please note that the corn flour dough does not respond in the same way as regular white flour dough. The best corn flours to make arepas are labeled P.A.N., and are available in most supermarkets in New York and elsewhere. It is important that the dough is not too dry or it will crack around the edges when you shape the arepas. It is also important to know that corn meal absorbs water slower than regular wheat flour.

Arepas are pretty filling depending on your stuffing, so 2 arepas per person should be enough.

Recipe: Homemade Arepas

Recipe by Indira – Tina’s friend Course: BakingCuisine: Venezuela
Servings

4

arepas

Arepas are actually incredibly easy to make, once you understand how to deal with the dough. Please note that the corn flour dough does not respond in the same way as regular white flour dough. The best corn flours to make arepas are labeled P.A.N., and are available in most supermarkets in New York and elsewhere. It is important that the dough is not too dry or it will crack around the edges when you shape the arepas. It is also important to know that corn meal absorbs water slower than regular wheat flour.

Ingredients

  • 250g 250g  (just over 1 cup) of warm water

  • 1 teaspoon 1 salt

  • 1 teaspoon 1  sunflower oil for the dough

  • 1 teaspoon 1 sunflower oil for the skillet

  • Approximately 135 grams (0.3 lbs/ a little under a cup) Harina P.A.N. pre-cooked corn flour (save a little of the flour after for later)

Directions

  • Fill a bowl with hot water, salt and oil.
  • Add the corn flour to the water little by little. Make sure to save a little of the flour for later. Gather and mix the dough with your fingers. The dough should be soft and on the moist side.
  • Let the dough rest for about 10 minutes to give it time to absorb the water. If the dough is too wet and difficult to shape, add a little more flour to the dough.
  • Heat the skillet on a medium-high heat. Meanwhile, divide the dough into 4 portions and shape one portion of the dough at a time. Roll the dough in your palms so it almost shapes into a ball. Press the dough slightly flat between your two palms and then use both your palms to rotate, and shape the dough into a pita bread shape. Pat the sides while shaping a bit and continue until the dough is about ½ inch thick.
  • Add a little oil to your skillet and spread it evenly across the skillet using a piece of paper towel. Place the shaped dough portions on the hot skillet and allow them to cook until they become golden, about 10 minutes – then flip your arepas and cook the other side. Once both sides are cooked, they are ready to serve.
  • Arepas should be served hot (you can fold them into a clean dishcloth to keep the heat) and can be sliced like pita bread or burger buns. Fill your arepas with a little butter and grated cheese or the ingredients of your choosing. The possibilities are endless. I personally like a little avocado/guacamole and chicken in my arepas or for a breakfast version serve them with scramble eggs.

Recipe: Homemade Taco Seasoning

Recipe: Homemade Taco Seasoning

This homemade taco seasoning brings authentic flavors to your dishes without the added sodium and artificial additives often found in store-bought packets. By making it at home, you ensure a healthier and fresher version tailored to your taste preferences. My taco seasoning is made with ingredients including cumin, paprika, chili powder, garlic powder, and onion powder, and this mix is not just reserved for tacos. Its versatility extends to sprinkling over vegetables, blending into soups, and spicing up grilled meats.

Recipe: Homemade Taco Seasoning

Recipe by 2 Hungry Birds – Tina Course: Sauces and Condiments
Servings

1

jar

My taco seasoning is made with ingredients including cumin, paprika, chili powder, garlic powder, and onion powder, and this mix is not just reserved for tacos. Its versatility extends to sprinkling over vegetables, blending into soups, and spicing up grilled meats.

Ingredients

  • 4 tablespoons 4 chili powder

  • 2 tablespoons 2 paprika

  • 6 teaspoons 6 ground cumin

  • 1 teaspoon 1 garlic powder

  • 1 teaspoon 1 onion powder

  • 1 teaspoon 1 crushed chili flakes

  • 1 teaspoon 1 dried oregano

  • 4 teaspoons 4 salt

  • 4 teaspoons 4 black pepper

Directions

  • Mix all the spices together and put it in a little jar.
  • Use about 2 ½ tablespoons of seasoning for a batch of meat, vegetable or tofu. You can adjust the spice – if you want it spicier, just add more of the mix.
Recipe: Homemade Taco Seasoning

Recipe: Bánh mì thịt nướng (Vietnamese sandwich with grilled pork chop)

Recipe: Bánh mì thịt nướng (Vietnamese sandwich with grilled pork chop)

bánh mìthịt nướng (Vietnamese sandwich with grilled pork chop) is my favorite kind of sandwich. It was created in Vietnam during French colonial rule, and has influences from both cultures. The sandwich is typically made with French baguette and pâté, with different variants of Vietnamese meats and ingredients as the filling. The banh mi ‘thit nuong’ (grilled pork chop), however, is at the top of my list.

Unfortunately you can’t just whip this one up on the spot, as it demands a little preparation at least one day in advance.  The meat is best marinated the day before, and the do chua’ (pickled daikon and carrots) can be made the day before as well – but will be better if it is made the week before.

I usually marinade a bunch of pork chops, have them for dinner the first day, and then use the leftovers for sandwiches the following day.
The do chua is generally amazing with rice and meat dishes, and it lasts for about a month in the refrigerator, leaving you plenty of time to nibble.

The picture below is a banh mi stand right around the corner of my grandmother’s house. This woman arrives early every morning and sits there all day long in the blazing hot sun.

Recipe: Bánh mì thịt nướng (Vietnamese sandwich with grilled pork chop)

Recipe: Bánh mì thịt nướng (Vietnamese sandwich with grilled pork chop)

Recipe by 2 Hungry Birds – Tina Course: Lunch, sandwichCuisine: Vietnam
Servings

2

sandwiches

bánh mìthịt nướng (Vietnamese sandwich with grilled pork chop) is my favorite kind of sandwich. It was created in Vietnam during French colonial rule, and has influences from both cultures. The sandwich is typically made with French baguette and pâté, with different variants of Vietnamese meats and ingredients as the filling. The banh mi ‘thit nuong’ (grilled pork chop), however, is at the top of my list.

Ingredients

  • 1 1 thit nuong pork chop, grilled and sliced into smaller pieces

  • Do chua – pickled daikon and carrots

  • 2 2 sandwich-sized baguettes, the light and fluffy kind

  • 1 tablespoon 1 mayonnaise

  • A couple of sprigs of cilantro

  • 1 1 jalapeño, seeded and sliced crosswise into smaller pieces

  • ¼ ¼ English cucumber, cut into sticks

Directions

  • Slice the sandwich bread halfway lengthwise.
  • Spread some mayo on each side of the sandwich and lay the thit nuong evenly on the bottom of the sandwich.
  • Add cilantro, jalapeno, cucumber, and do chua on top and close the sandwich. Wrap some sandwich paper around one end for easy eating.

Recipe: Vietnamese THỊT NƯỚNG (CARAMELIZED GRILLED PORK)

Recipe: Vietnamese THỊT NƯỚNG (CARAMELIZED GRILLED PORK)

The traditional way of making thit nuong is to cut the meat into 2-3 inch strips, then marinade the meat and grill it in between two wire baskets over a charcoal grill. The marinade consists of caramelized sugar syrup (nuoc mau) and fish sauce, two cooking essentials in the Vietnamese kitchen.

The fish sauce is very salty (and a bit smelly), but it has a lot of flavor. I often add a few dashes to my chicken, pork, and shrimp instead of salt and a little bit of sugar to get the protein crispy.

There are a bunch of traditional Vietnamese dishes where thit nuong is included, but here are a few of my favorites:
• Rice with grilled meat (‘com thit nuong’ as seen on the top picture)
The Vietnamese sandwich (banh mi thit nuong)
• Angel hair rice noodles with grilled pork, served with lettuce for wrapping (banh hoi thit heo nuong)

As a city-dweller I am not privileged to have a garden with an outdoor grill, so unfortunately I have to make this in my oven. For this I use pork chops, which are on the more fatty side. If you do have a charcoal grill, you can make it the traditional way and use pork butt or shoulder instead.

Recipe: Vietnamese THỊT NƯỚNG (CARAMELIZED GRILLED PORK)

Recipe by 2 Hungry Birds – Tina Course: DinnerCuisine: Vietnam
Servings

4

servings

The traditional way of making thit nuong is to cut the meat into 2-3 inch strips, then marinade the meat and grill it in between two wire baskets over a charcoal grill. The marinade consists of caramelized sugar syrup (nuoc mau) and fish sauce, two cooking essentials in the Vietnamese kitchen.

Ingredients

  • 2 lbs 2 900 grams) pork chops (or 1 ½ lbs. (680 grams) pork butt or shoulder, thinly sliced to about ¼ inch thick)

  • ¼ cup ¼ (60 ml) lemongrass, minced

  • ¼ cup ¼ (60 ml) sugar

  • 1 tablespoon 1 ground pepper

  • 2 tablespoons 2 fish sauce

  • 3 tablespoons 3 sesame oil

  • 3 3 garlic cloves, crushed and minced

  • 3 3 small shallots, minced

  • 1 tablespoon 1 nuoc mau (Vietnamese caramel syrup)

Directions

  • Prepare the marinade with the above ingredients and coat the meat to marinade for at least 1-2 hours or for more enhanced taste the day before.
  • For oven: Set the oven to broil or grill and place the meat on a grilling rack right under the heating element. Broil/grill a few minutes on each side.
    For charcoal grill: lay out the meat in between two wire baskets and grill for a few minutes on each side.
Recipe: Vietnamese THỊT NƯỚNG (CARAMELIZED GRILLED PORK)

Recipe: Dragon Fruit Breakfast Bowl with Greek yogurt and granola

Recipe: Dragon Fruit Breakfast Bowl

Are you tired of the same old breakfast routine? Here is a new and delicious way to start your day. This delightful Dragon Fruit Breakfast Bowl with Greek yogurt and granola looks gorgeous and tastes divine. The recipe only has three ingredients but can be tweaked in any way you like.

Want something sweeter? Drizzle with honey. Want more fruit? Add berries, mango or young coconut. You can also replace the Greek yogurt with vanilla ice cream or coconut ice cream and serve it as a refreshing summer dessert.

We are using the nut free Cardamom & Cinnamon Granola from Hungry Bird Eats, which we think works particularly well with the dragon fruit flavor, but feel free to use any granola you like.

Recipe: Dragon Fruit Breakfast Bowl with Greek yogurt and granola

Recipe by 2 Hungry Birds Course: Breakfast, Dessert
Servings

2

servings

Are you tired of the same old breakfast routine? Here is a new and delicious way to start your day. This delightful Dragon Fruit Breakfast Bowl with Greek yogurt and granola looks gorgeous and tastes divine. The recipe only has three ingredients but can be tweaked in any way you like.

Ingredients

  • 1 1 dragon fruit

  • 10 tablespoons 10 Greek yogurt

  • 4 tablespoons 4 granola

  • Fresh mint leaves (optional, for garnish)

Directions

  • Wash the dragon fruit under running water to remove any dirt or impurities.
    Carefully slice the dragon fruit in half.
  • Using a melon baller or a small spoon, gently scoop out small, round dragon fruit balls from the flesh. Set them aside. Scoop out any remaining dragon fruit flesh.
  • Add 3 tablespoons of Greek yogurt to each of the the dragon fruit halves.
  • Now, it’s time to add those delightful dragon fruit balls to the yogurt bed. Carefully place them on top of the yogurt, arranging them in a visually pleasing pattern.
  • Add 2 tablespoons of Greek yogurt on top of the dragon fruit balls.
  • It’s granola time! Sprinkle your favorite granola over the yogurt and dragon fruit.
  • Garnish with fresh mint leaves and serve immediately.

Shop Hungry Bird Eats Granola:

Recipe: Warm Goat Cheese Toasts with Olive Tapenade

Recipe: Warm Goat Cheese Toasts with Olive Tapenade

Sanne: I first had these warm goat cheese toasts at a friend’s place, and I was immediately hooked. It’s such a great snack, and you only need 4 ingredients and 10 minutes to make it. A perfect nibble along with pre-dinner drinks, at the tapas table, or served together with a hearty soup.

I prefer to make the toasts with sour dough baguette, but any regular baguette would do too. The Spread-mmms tapenade has a nice kick that goes well with the sharp goat cheese flavor, but you can use any olive tapenade of your liking.

Recipe: Warm Goat Cheese Toasts with Olive Tapenade

Recipe by 2 Hungry Birds – Sanne Course: Appetizers, Snacks
Servings

12

pieces

I first had these warm goat cheese toasts at a friend’s place, and I was immediately hooked. It’s such a great snack, and you only need 4 ingredients and 10 minutes to make it. A perfect nibble along with pre-dinner drinks, at the tapas table, or served together with a creamy tomato soup.

Ingredients

  • 1 1 baguette

  • 2 tablespoons 2 olive tapenade

  • 1 1 small log of goat cheese with rind ( you would need enough to cut 12 discs, ½ inch (1 ½ cm) thick

  • Olive oil to drizzle

Directions

  • Preheat the oven to 425°F (225°C)
  • Cut the baguette into 12 slices about ½ inch thick.
  • Pour a bit of olive oil on a plate and dip each side of the sliced bread in the oil.
  • Place the olive-soaked bread slices on a baking sheet.
  • Cut the goat cheese log into 12 discs about ½ inch thick.
  • Place the cheese on top of the bread slices.
  • Bake for 4-5 minutes and keep an eye on the toasts all the time, as they are easy to burn. When the bread is slightly golden, and the cheese turns soft and start melting the toasts are ready.
  • Top with olive tapenade and serve hot. You can also add the tapenade before baking. I’ve tried both options, and I like the flavor better, when added afterwards.

Recipe Video